
Add refund
The screenshots on this page do not all reflect the new web version yet.
Refunds are created to rectify and document payment corrections.
A refund records money transferred from your business to the Bill To company.
Before adding a refund transaction in Case Manager it is important to understand how they function and when you need to create them, see Refunds.
- Select the payment where the refund applies.
- Click the New button
 and select New Refund from the dropdown list.
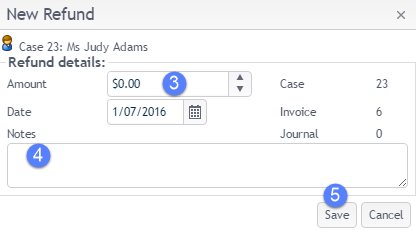
 - As discussed above, Case Manager automatically enters an amount here that would balance out the invoice.
- You are required to enter a reason for the refund in Notes.
- Click Save.
If this value is negative, the amount will be set to zero. You can change this value to another (positive) amount.
Print refund
As described at Printing accounting transactions refunds have templates applied to them that specify their layout. These templates are applied when you print them.
You can download a PDF file of the refund print document by selecting it and clicking the print icon  .
.