
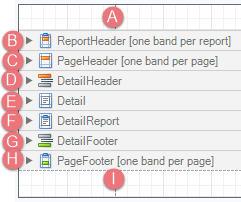
Report Designer example
This example follows from the basic introduction at Simple template modifications using Report Designer.
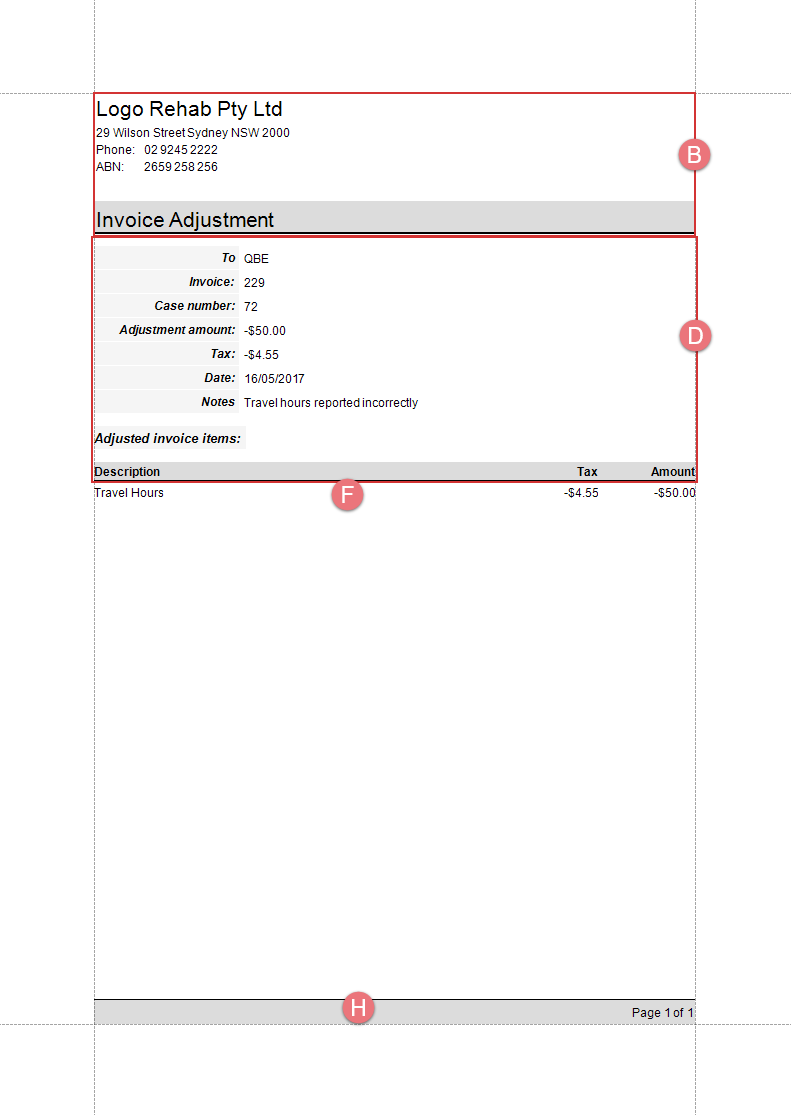
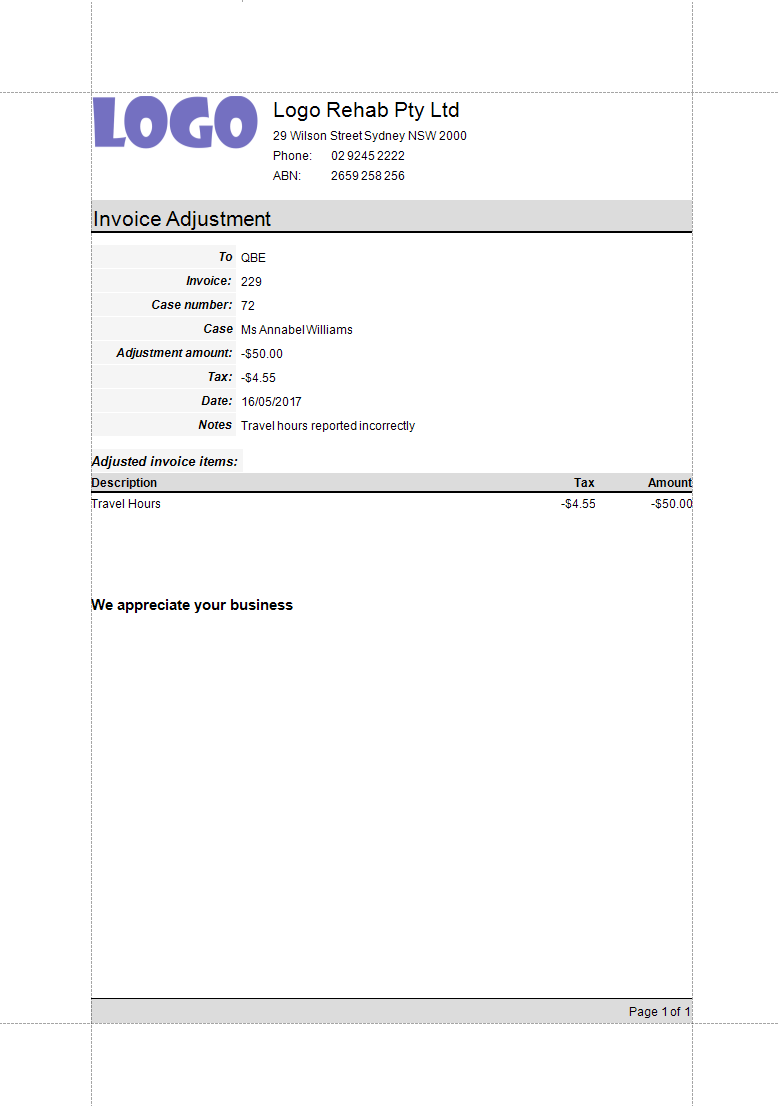
The screenshot below is the print preview for a line item adjustment. It uses the default adjustment template.
 Click image to enlarge/reduce it. You can only enlarge one image at a time.
As previously explained, the components of this page correlate with the sections of the template.
Customising the template
This page explains how to customise the template. We will add a logo, another labelled Case Manager field and some text.
Add a logo to the template
Click the animated graphic below to see the process of customising the template with a logo.
 Click image to enlarge/reduce it.
You can only enlarge one image at a time.
Click image to enlarge/reduce it.
You can only enlarge one image at a time.
The steps above are:
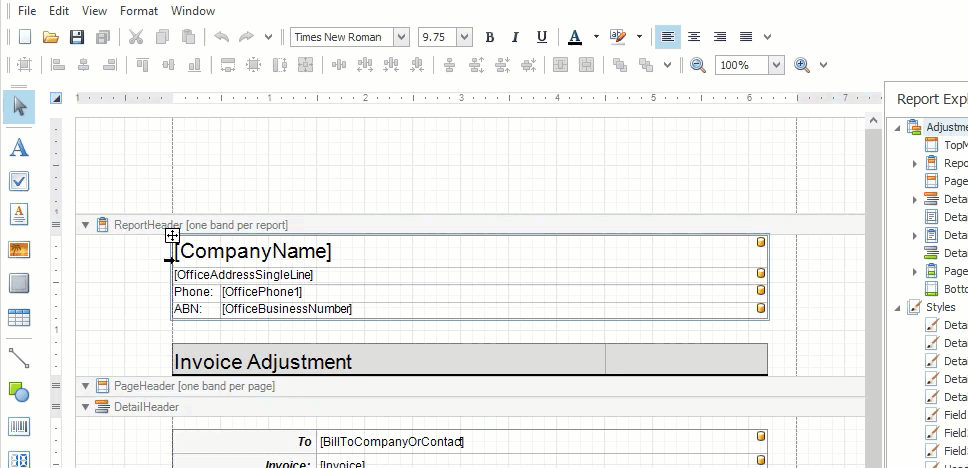
- Make some room for the logo next to the company and office information:
- Add a picture to the template.
select the table, reduce its width, reposition its cell boundaries and move the whole table to the right.
Select the Picture Box icon from the tools menu and drag out a suitably-sized picture box at the logo's desired location.

Click the > icon at the top RHS corner of the picture box.

By default, Sizing is set to Normal, so you will see as much of the image as will fit into the picture box. If the image does not fit, you can set the sizing to Zoom Image which will shrink the logo to fit the picture box and also retain its aspect ratio (proportions). If there is enough room, you could also set the sizing to Auto-size. This will resize the picture box so that it is as big as the logo’s actual size.
 Click image to enlarge/reduce it.
You can only enlarge one image at a time.
Click image to enlarge/reduce it.
You can only enlarge one image at a time.
Select the row of dots to browse for and add the logo to the picture box.
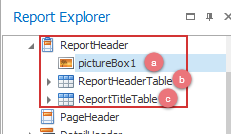
You can see that the Report Explorer now shows the new logo (a) in the report header, along with the existing header table (b) and title table (c).
Add system information to template
This process is split up here into several animations.
Click the graphic below to see the process of creating space for the new information.
 Click image to enlarge/reduce it.
You can only enlarge one image at a time.
Click image to enlarge/reduce it.
You can only enlarge one image at a time.
The step above is:
- Once again create space, this time at the bottom of the Detail Header:
Drag the bottom boundary of the detail header downwards to create space and move the one-row table and text box downwards.
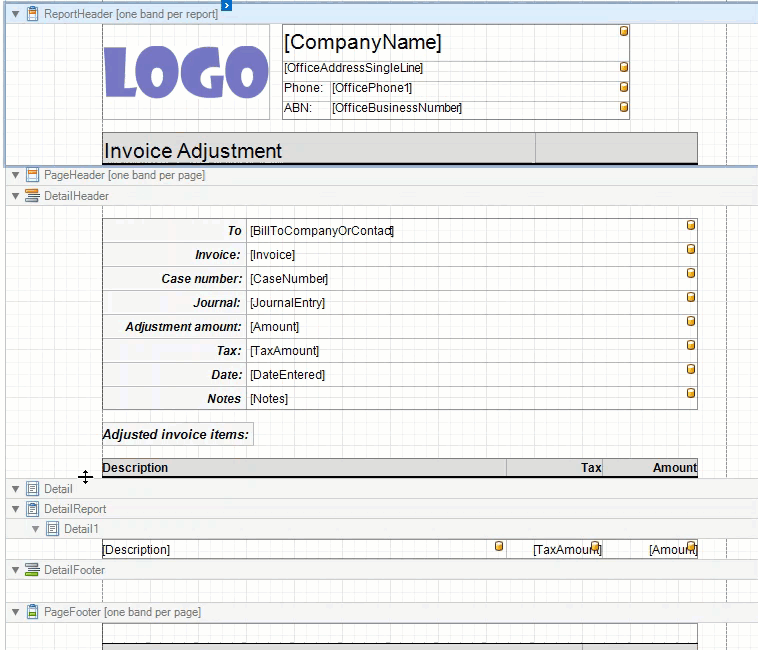
The table in the Detail Header holds a set of: Case Manager fields (right column) and labels for the fields (left column). Click the graphic below to see the process of creating a suitable new row in the table.
 Click image to enlarge/reduce it.
You can only enlarge one image at a time.
Click image to enlarge/reduce it.
You can only enlarge one image at a time.
The steps above are:
- At the desired location in the table right-click and insert a new row.
- Double-click the text in the new left hand cell to rename it.
- Give it the same style as the other label cells:
select the table cell and then click the open icon next to Styles in the Property Grid at the bottom RHS.
Click Style, click the v icon and then select Label3_Style from the dropdown list.
Click the graphic below to see the process of styling the field cell in this new row.
 Click image to enlarge/reduce it.
You can only enlarge one image at a time.
Click image to enlarge/reduce it.
You can only enlarge one image at a time.
The steps above are:
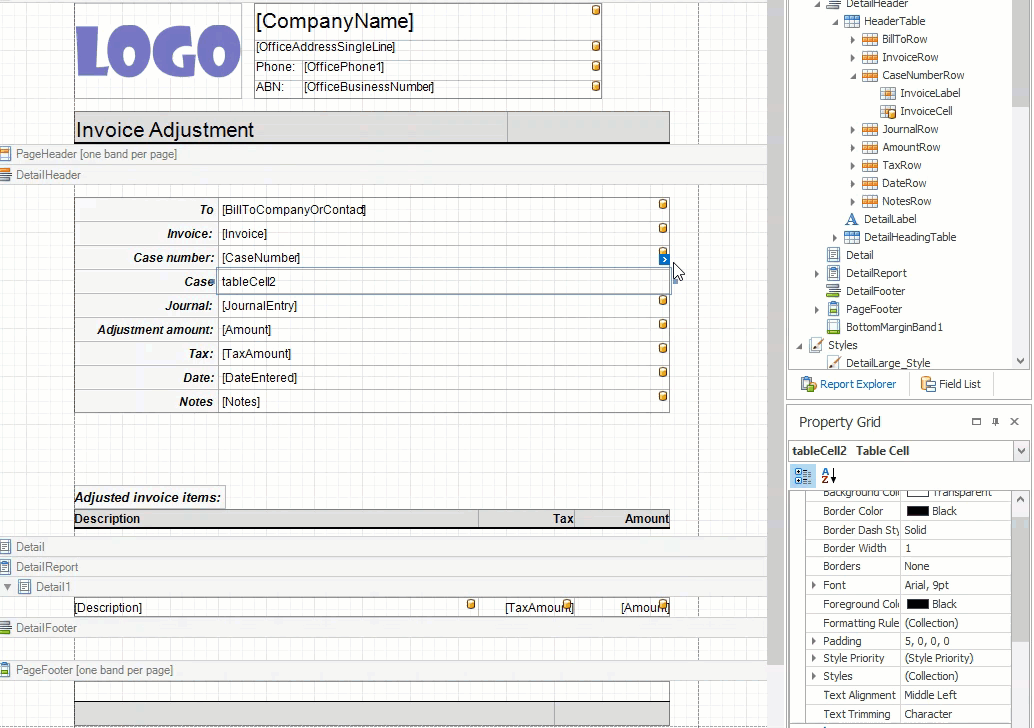
- Format the new right hand cell using the same technique, this time with the style Field3_Style.
Click the graphic below to see the process of linking system information to this cell.
 Click image to enlarge/reduce it.
You can only enlarge one image at a time.
Click image to enlarge/reduce it.
You can only enlarge one image at a time.
The steps above are:
- Click the > icon at the top RHS of this cell so that you can link it to a Case Manager field. This opens the Table Cell Tasks window.
- Click the v icon next to Data Binding to select a Case Manager field from the nested, dropdown list.
It's a good idea to study the structure in advance by clicking Field List tab next to the Report Explorer. This shows all the database fields available.
In this demo we are looking for an invoice field: the customer's full name.
Once it has been selected, the cell's contents are replaced with the field.
A new row has now been added to the detail header table and it will display the case customer's name.
Add some text to the template
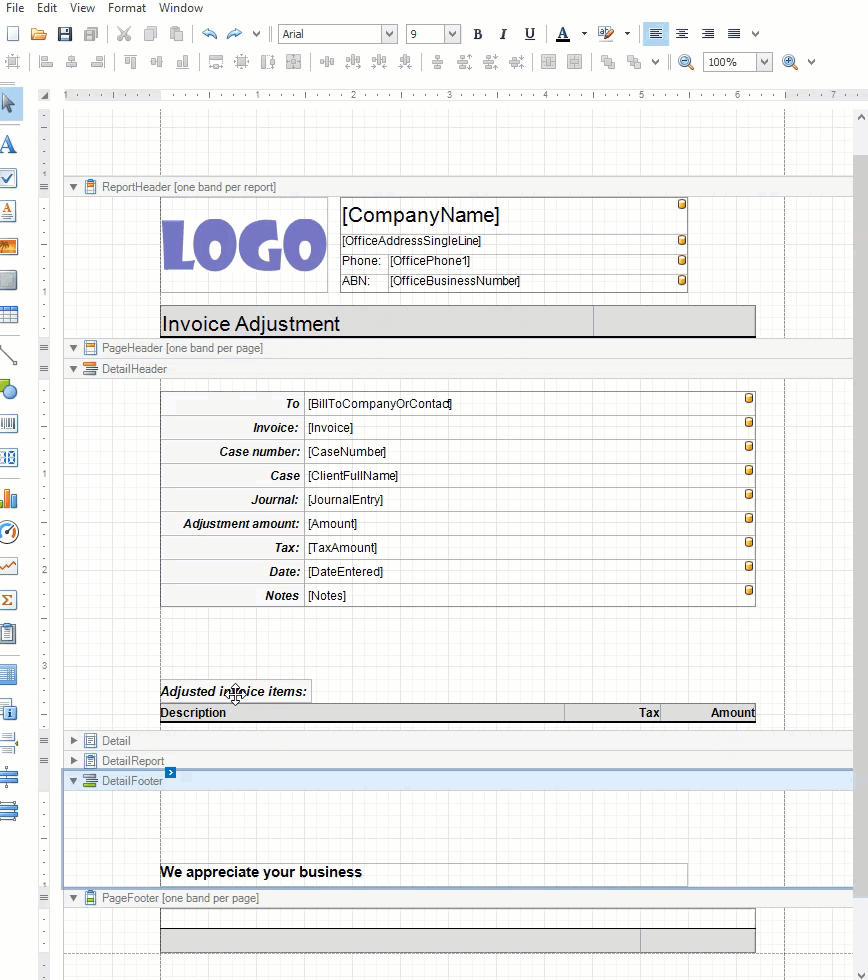
We want to add a friendly greeting at the end of the adjustment information. We put it in the Detail Footer (previously empty), so that it appears on both kinds of adjustments.
Click the animated graphic below to see the process of adding some text to this template.
 Click image to enlarge/reduce it.
You can only enlarge one image at a time.
Click image to enlarge/reduce it.
You can only enlarge one image at a time.
The steps above are:
- Select the Detail Footer and create some space as before.
- Click the Rich Text tool and drag out a text box in the Detail Footer.
- Format the text using the formatting tools in the Property Grid at the RHS.
- Select part of this text and paste your new text. Remove unwanted text.


Cosmetic changes
For the last step we perform some minor re-arrangements and save the template:
 Click image to enlarge/reduce it.
You can only enlarge one image at a time.
Click image to enlarge/reduce it.
You can only enlarge one image at a time.
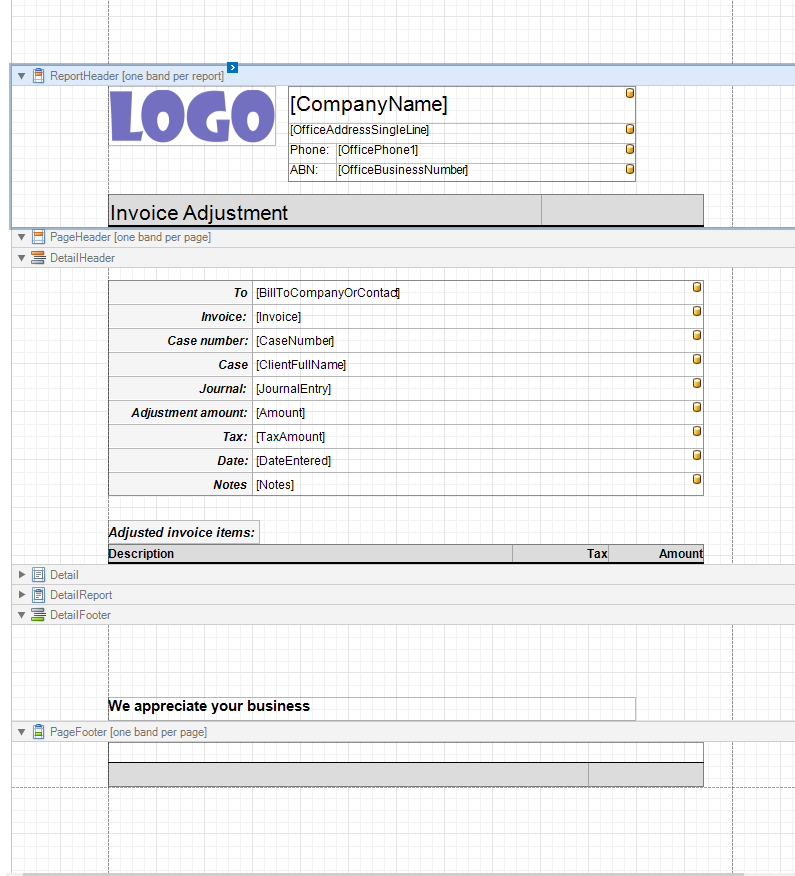
Final outcome
At the end of this series of steps the template looks like this:
 Click image to enlarge/reduce it. You can only enlarge one image at a time.
A print preview of the same adjustment (seen at the top of the page) using the template:
 Click image to enlarge/reduce it. You can only enlarge one image at a time.
Preview template
You may be tempted to select View >Preview or HTML View to preview your template in action as you work on it. Be aware that these do not give the results that you expect.
The best way to preview your changes is to save the template, keep the Report Designer window open, return to a case and choose a suitable transaction in the Account tab. When you print it to the Preview window the most recently saved template will be applied to the transaction. You can then make further changes in Report Designer if required. Make sure that you are printing a transaction that will use the exact template that you were modifying (i.e. at the system, category or company level).
Note that in Report Designer you must make sure that your most recent change is unselected when you save the file. Simply click elsewhere on the screen to de-select it. You can see this demonstrated in the animation immediately above.
If you have trouble with Report Designer, you can save your template to a file as explained at the beginning. We can assist you if you email it to Case Manager Support, along with a sample document to show how you want things to look. If you need a new image added to the template, you should also attach that file. We can then make the changes for you and email you the updated template file.