Simple template modifications using Report Designer
The instructions on this page and the next page explain how to make simple modifications - add a logo, some text and some system information - to your accounting templates in Report Designer. These instructions use the default adjustment template. Other accounting templates look a little different but the principles are the same.
You open Report Designer as the last step of changing templates at the company, category and/or system levels, see Print accounting transactions.

After you have clicked Edit Layout, Report Designer opens up, with your template loaded and ready for editing. The first time you do this it starts with the default template.
Report Designer has a number of powerful features and it looks a little complex. But do not be alarmed. There are a number of simple things that you can do here to customise your templates if you follow the instructions below carefully. In these examples, we are customising an adjustments template, however the instructions apply generally to the templates for payments and refunds.
Save first and save often
The first things to do if you are modifying a customised template in Report Designer is:
- Select File >Save As from the main menu and save a copy of the existing template to your own computer.
- Close Report Designer and then click Edit Layout to re-open the template again and actually start making changes to it.
This way, if you accidentally destroy something important in the existing, customised template, you can easily re-load to the local file and begin again. You can also use a saved template file as the foundation for category and company templates or to email to us if you need help.
When you re-open Report Designer and start making changes, save the file often as you go along. And don't forget that the classic Ctrl+Z undo command will undo your changes, one at a time.
Concepts
Technically, the template is considered to be a report and it can accommodate a multi-page document. You can think of this as a 'smart' template because code can be embedded in the template, as is the case with the default templates, even though it's not obvious.
The report is divided into sections and some of these are pre-populated with Case Manager fields. Fields and text are almost always organised in tables because this holds related information together and aligns it on the page.
The screenshot below shows the basic structure in the main body of the template, with each section closed to make the structure more obvious.
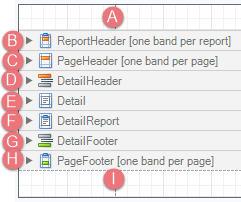
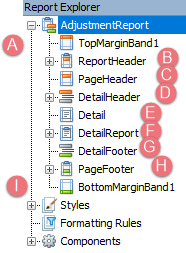
- The top margin band - empty in this template
- The header for the entire document
- The header for each page of the document - empty in this template
- The detail header
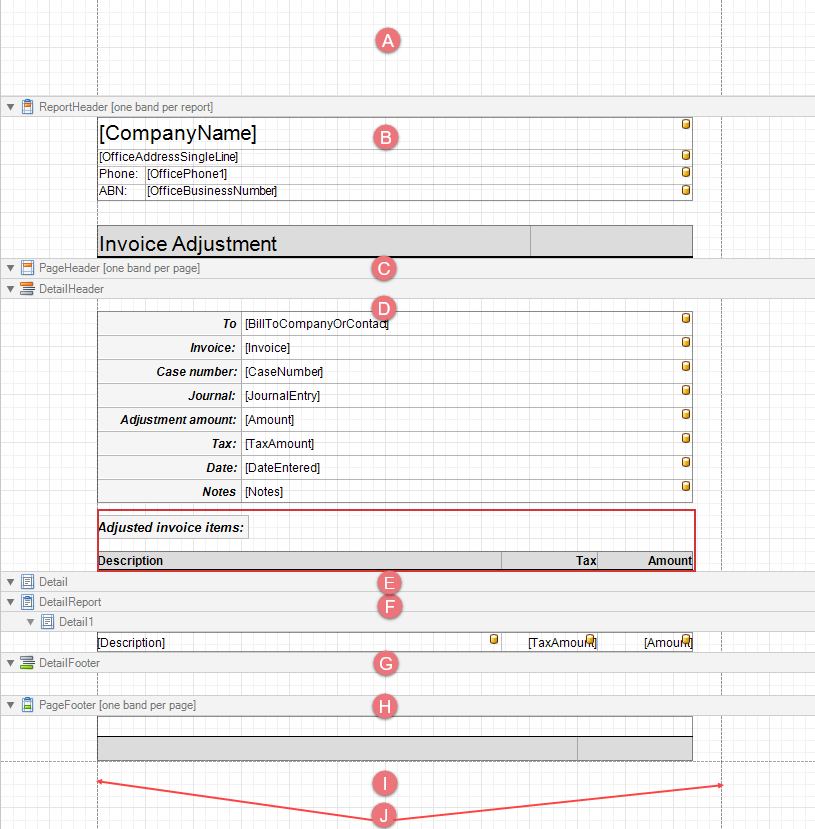
This contains a table containing labelled Case Manager fields: your company name and the office details for this adjustment.
Underneath is a grey table with a border. It contains the text Invoice Adjustment. This table automatically fills the page between its left and right margins.
This contains a table with labelled Case Manager fields, the invoice contact's company, invoice number, case number, etc.
It also contains headings (indicated by a red box) that will display if there are any invoice line item adjustments listed in the Detail Report (at F), see Types of Adjustments.
 Click image to enlarge/reduce it. You can only enlarge one image at a time.
- Detail - empty in this template
- Detail Report
- The detail footer - empty in this template
- The page footer
- The bottom margin band - empty in this template
- Note that the template's left and right print margins are indicated by dotted lines. By default, Report Designer has set them for US Paper even though the Case Manager default templates fit within A4 widths. If you prefer that the margins are set for A4 paper, follow the instructions below.
This contains a 'smart' table, ready to display any invoice line item adjustments.
In this template it contains another grey, 'smart' table, with a border at the top. The table fits between the page margins. It will display the page number.
Report Explorer
The template structure correlates with the Report Explorer on the top right hand side of the Report Designer. Below each section is, once again, closed for simplicity:
Template in action
The screenshot below shows a print preview of a line item adjustment using this template.
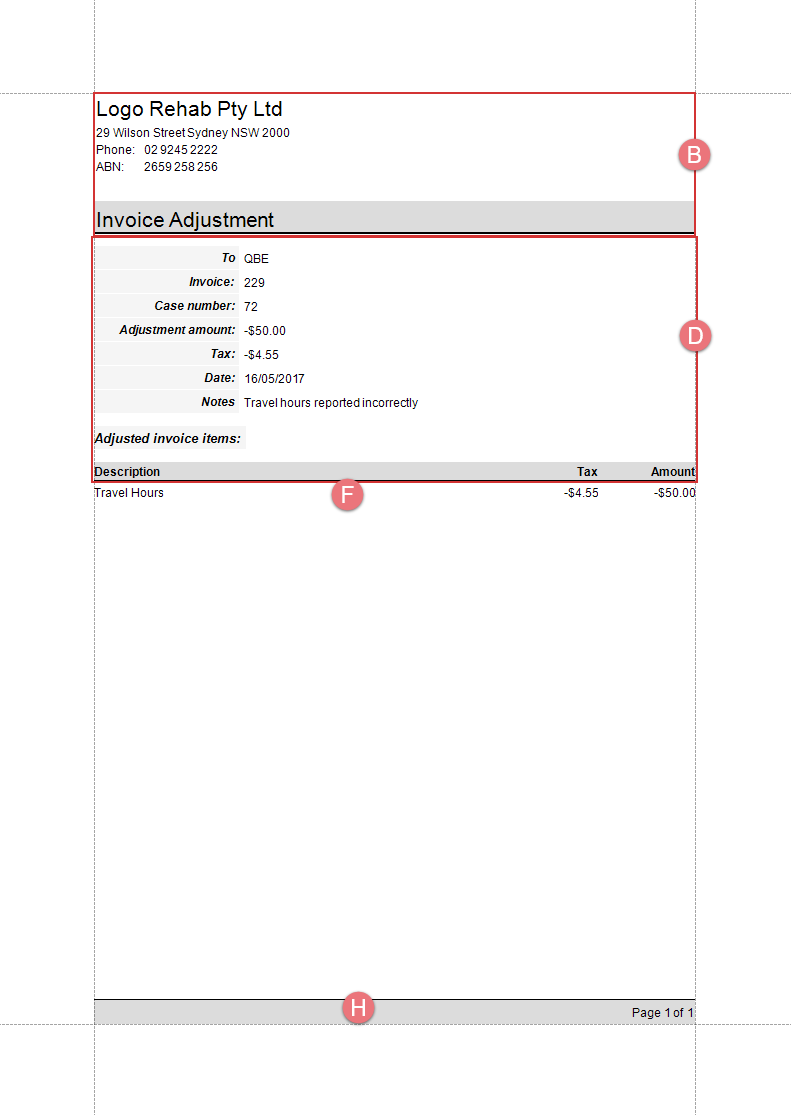 Click image to enlarge/reduce it.
Modifying the template
Now that you understand the structure of the template, go to the next page, Template modification example, to see a detailed, animated example explaining how to customise a template.
Set the print margins for A4 paper
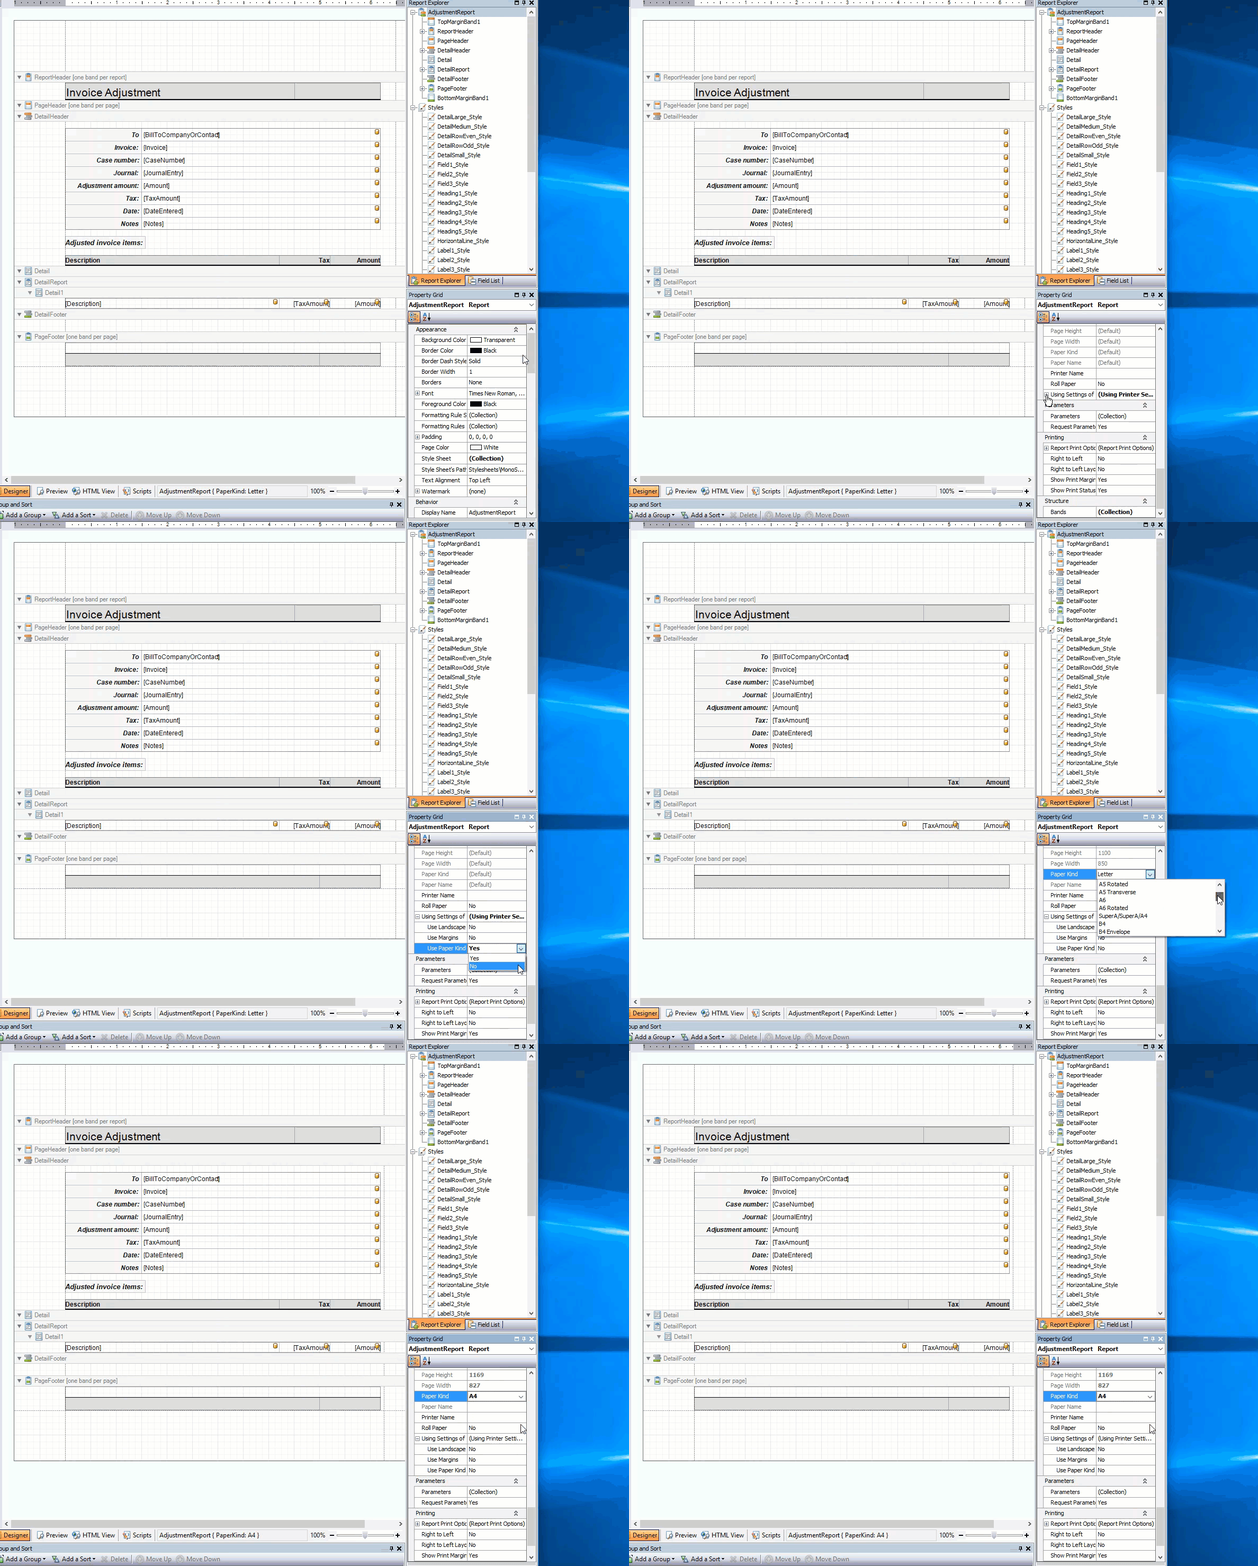
The left and right print margins are indicated by dotted lines. By default, Report Designer indicates the margins for US Paper, however the default templates are set to fit into A4 paper.
You may want to set these margins to A4.
Click the animated graphic below to see a demonstration of changing the Paper Kind to A4.

