
Global invoice template
The screenshots on this page do not all reflect the new web version yet.
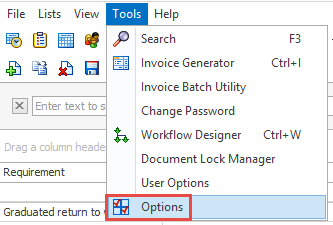
To specify or modify the global invoice template:
- Select Tools > Options from the main menu to open the System Options window.
- Select the Invoice Printing tab.
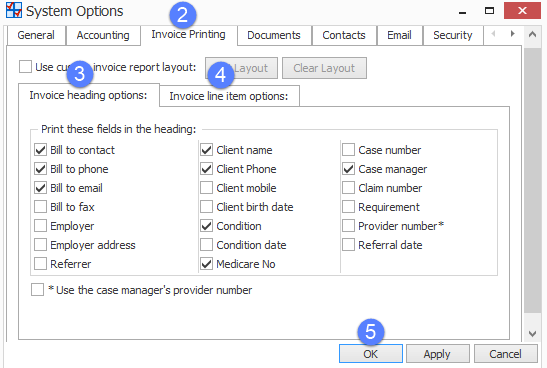
It is very simple to specify the information that should be taken from the Case Manager database.
- Select the Invoice heading options tab and select the checkboxes for the information that you want in the invoice heading.
- Select the Invoice line item options tab and select the checkboxes for the information that you want in the invoice body.
- Select OK to save the template, apply it to all invoices and close the window.
Alternatively select Apply to just save and apply the template.
For detailed explanations of the heading and line options and where they will appear on the final invoice see Heading and Line Item options.
Note that modification of the template affects all relevant invoices in the system. Obviously this can't change any static PDF files already created from invoices, but the invoices themselves will change.
Change the invoice layout template with Report Designer
Specifying other text and images to appear on the invoice and the way that everything should be laid out on the page involves Report Designer. This enables you to:
- Add or change text in the invoice template.
- Add a logo or other graphics.
- Change the layout of the template.
- Include fields from the database that are not offered in the heading and line item options tabs.
Use the Use custom invoice report layout checkbox to specify whether you want such changes to be applied to the layout of the invoice template.
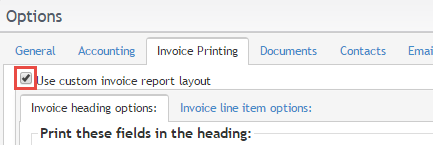
If you do not select the Use custom invoice report layout checkbox then the default invoice report layout is applied to the global invoice template.
It may be that there is an existing global custom invoice report layout already created in Report Designer and in the system. If so, select Use custom invoice report layout to apply it to the invoice template. Select OK to save this change to global invoice printing, apply the change to all invoices and close the window. Alternatively select Apply to just save and apply.
For instructions on having the layout template modified in Report Designer go to Report Designer.
Note that once you save a modified template this affects all relevant invoices in the system. Obviously it can't change any PDF files already created from invoices, but it will change the invoices themselves.