
Audit History
As of Case Manager Version 6.3, an Audit History feature can be enabled. This feature will automatically maintain a history of changes made to certain aspects of your Case Manager system. This includes changes made to:
- Case Details
- Documents *
- Case Contacts
- Costs
- Custom Fields
- The Company List
-
System Options
Please note that this feature is currently only available in the Web version of Case Manager.
The audit history is only recorded from the introduction of version 6.3 onwards. Any data entries that existed before the release of version 6.3 will not be able to show any change history.
* The Audit History feature will track all changes made to Plain Text, Formatted Text, SMS and Email document entries. However, changes made within external documents such as Word, Excel and PDF are not able to be monitored or recorded.
Enabling Audit History
The ability for Case Manager to maintain an audit history is optional. To set up this feature there are three easy steps:
-
Navigate to the Security tab under Tools > Options.
-
Here you will see a setting that allows you to turn the Audit History feature on:

-
Enable the setting as seen above then click 'Save'.
Configuring Access to Audit History
There are two new Security Group permissions that determine who can view and control the Audit History feature:
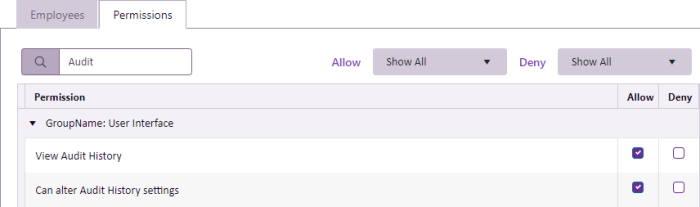
These settings will need to be applied to the appropriate Security Groups that you would like to have access to this feature.
At minimum, the 'View Audit History' setting will need to be applied to use the feature. This will allow the appropriate Security Groups to see the button that opens the Audit History window.
Using Audit History
There are two ways for you to view the audit history:
System-Wide
You can view and filter audit history results for the whole system by navigating to View > Audit History.
In this menu, the left-hand side displays the filter options:
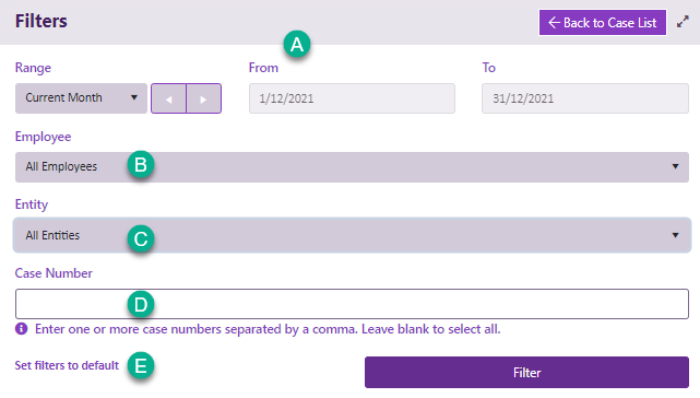
Here you can set filters to specify:
- A date range.
- A selection of employees.
- Entities (these are the aspects of Case Manager that you want to see changes for).
- A list of cases.
- You can reset the filters to their default settings by clicking this option.
Once you have set your preferences, select Filter to display the results on the right-hand side.
You can then use the grid filter options to refine the results further if desired.
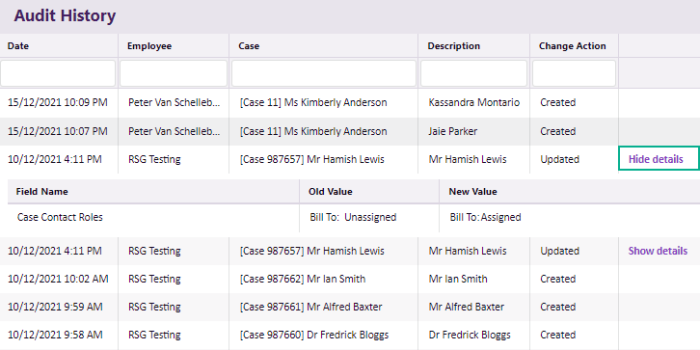
The example below is filtered to show the audit history for Contacts. For each updated record, you can click the Show details option to expand on the changes listed in the results:
Item-Specific
Users with the appropriate permission will be able to see a View History button on the pages of your Case Manager system (listed at the top of this page) that maintain an audit history:

If you select an item on these pages, you can then click the View History button to show the changes that relate to the selected item.
For example, on the Documentation tab of a case, you can select a document entry:
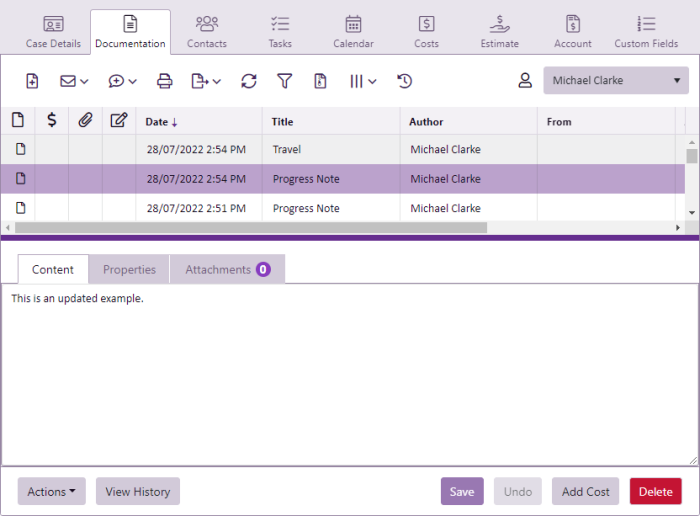
Here you can see the View History button in the footer toolbar, to the left of the Save buttons. Click this button to see the changes that relate to the selected document:
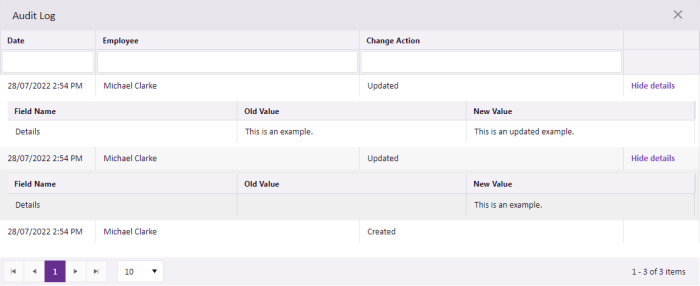
As with the system-wide results, you can click Show details option to expand on the changes listed in the Audit Log.