
Scheduler views and filters
Use the toolbar to choose a view and layout, and the panel on the left to choose what the Scheduler shows.
Views and layouts
Choose Day, Week or Month, and then a layout:
-
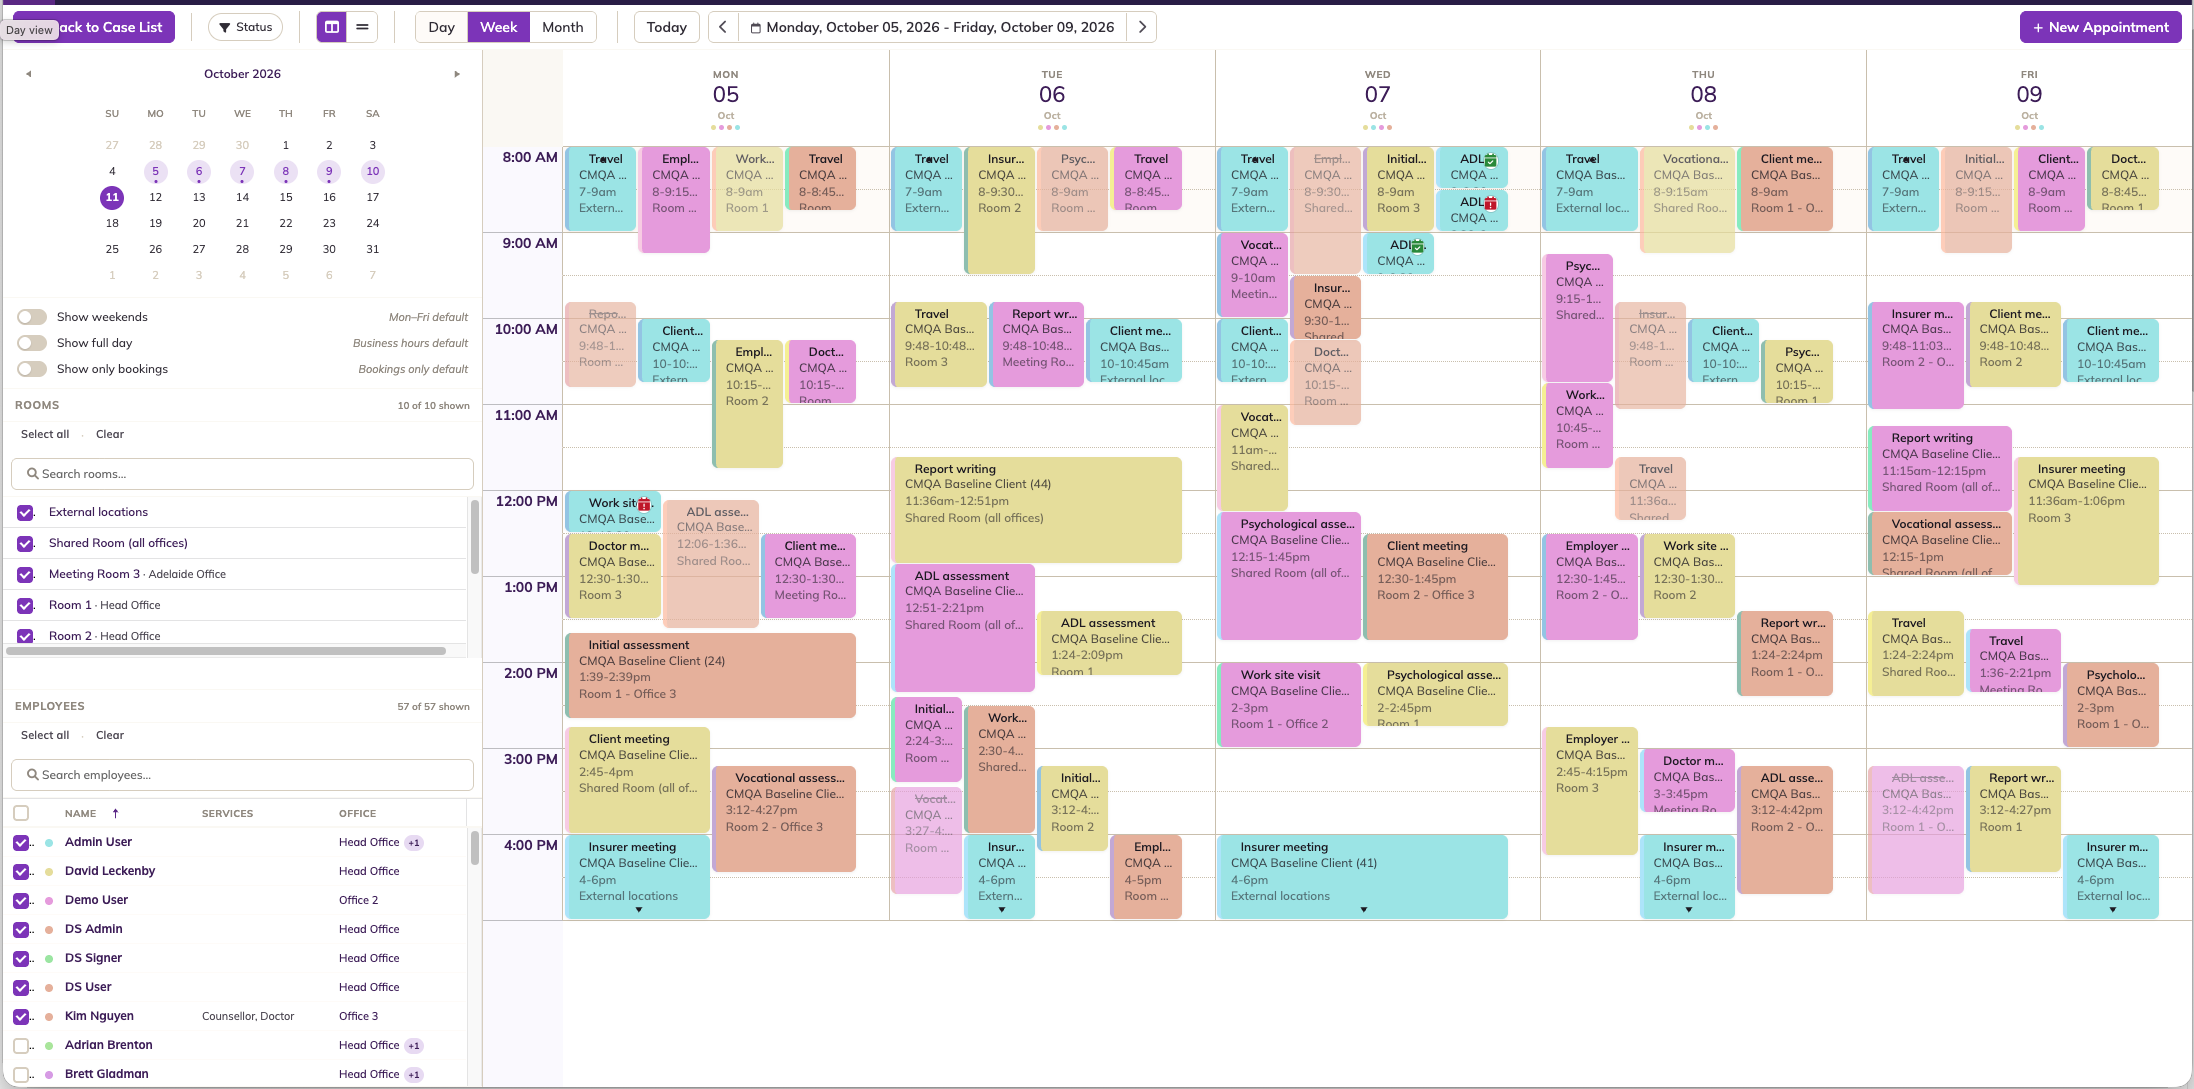
 Vertical: time runs down the page. In Day view, each employee is a column. In Week and Month view, each day is a column, and the selected employees' appointments are shown side by side.
 -
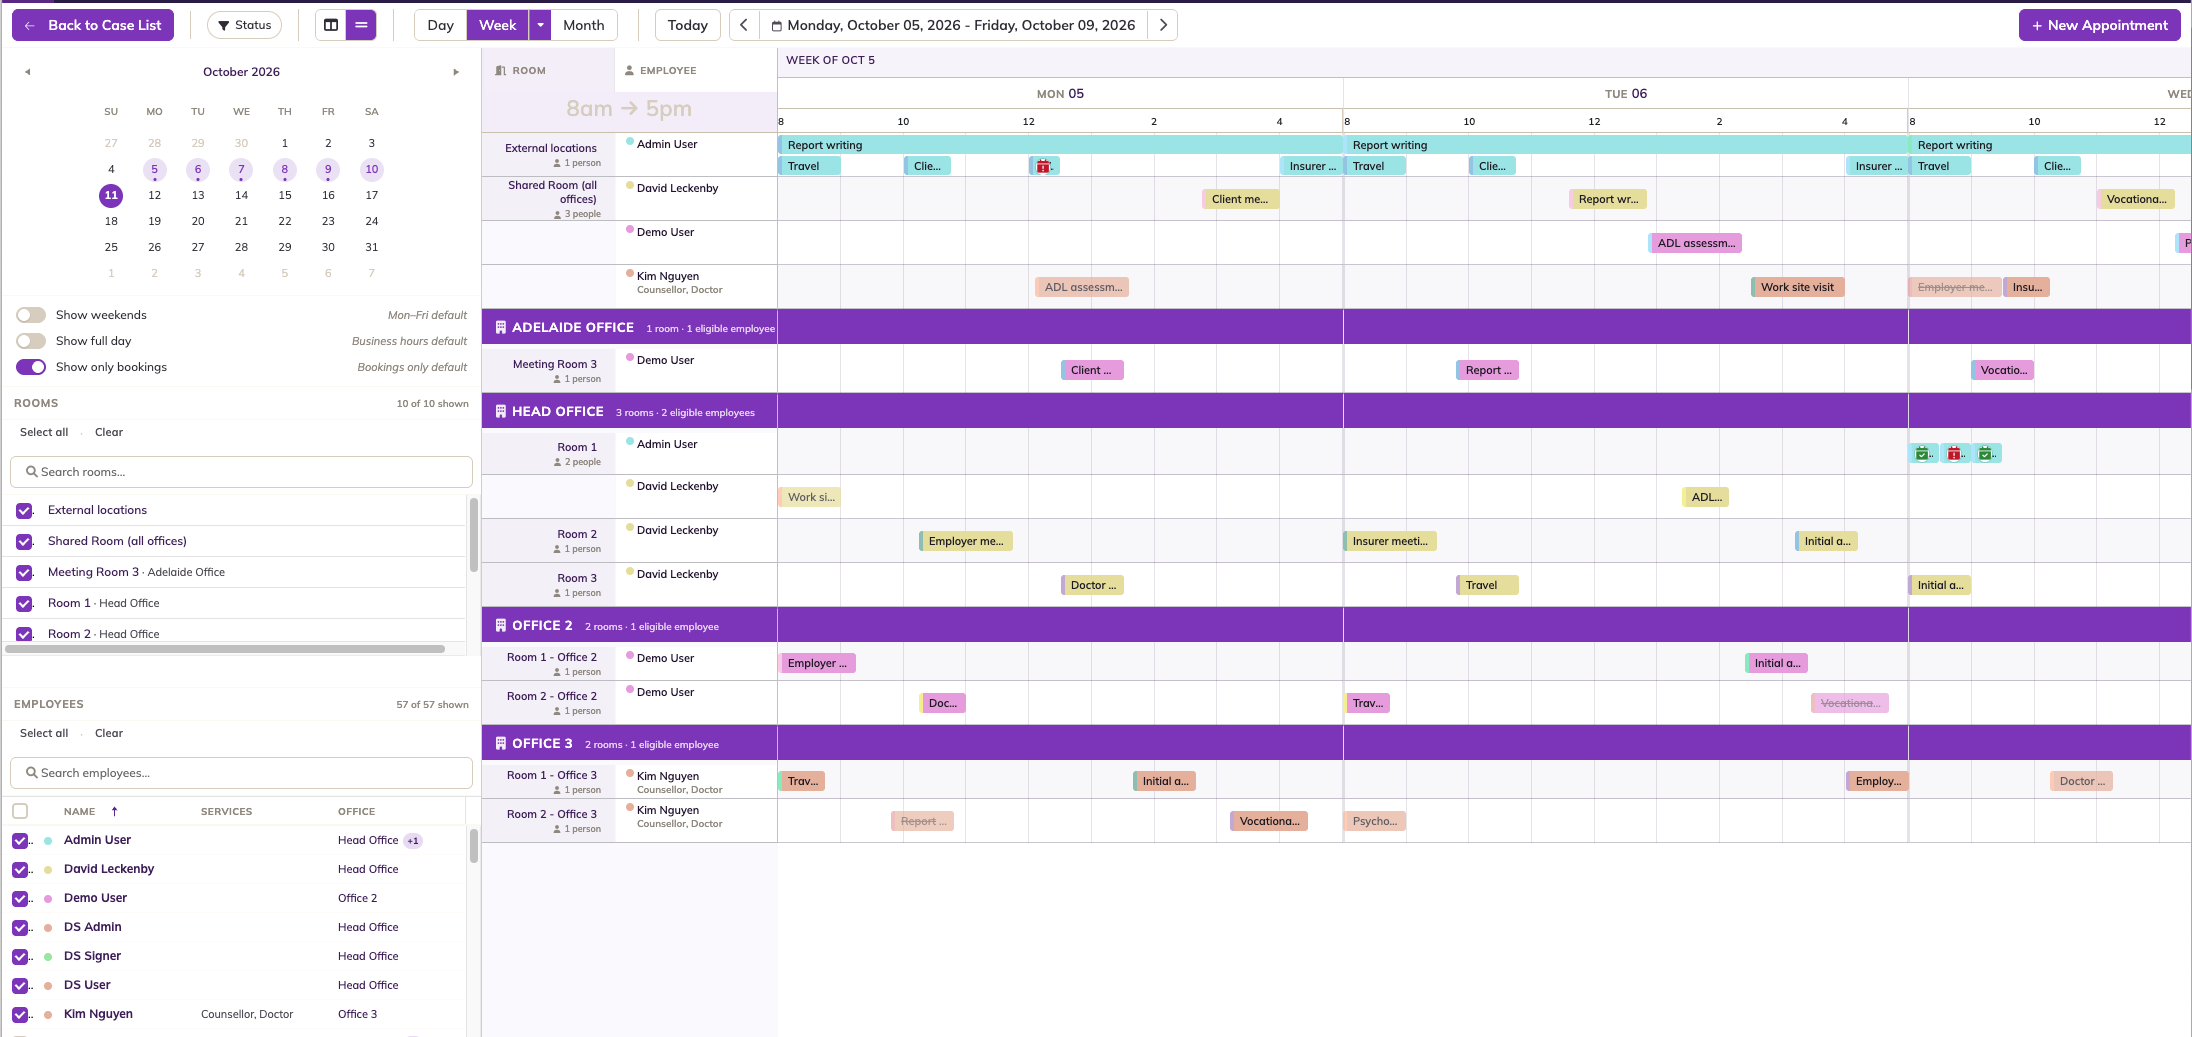
 Horizontal: time runs across the page, and each row is a room and an employee who can be booked in it.
That gives six layouts. A few behave differently:
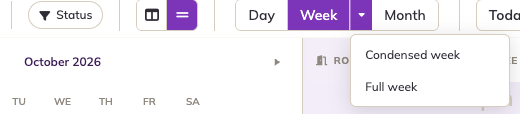
- Week, Horizontal has two options. Click the arrow next to Week and choose Condensed week to show a single line per appointment, with the details on hover, or Full week to show the title and employee name and scroll across.
- Month, Vertical shows +X more on a day with more appointments than fit. Click it to see them all.
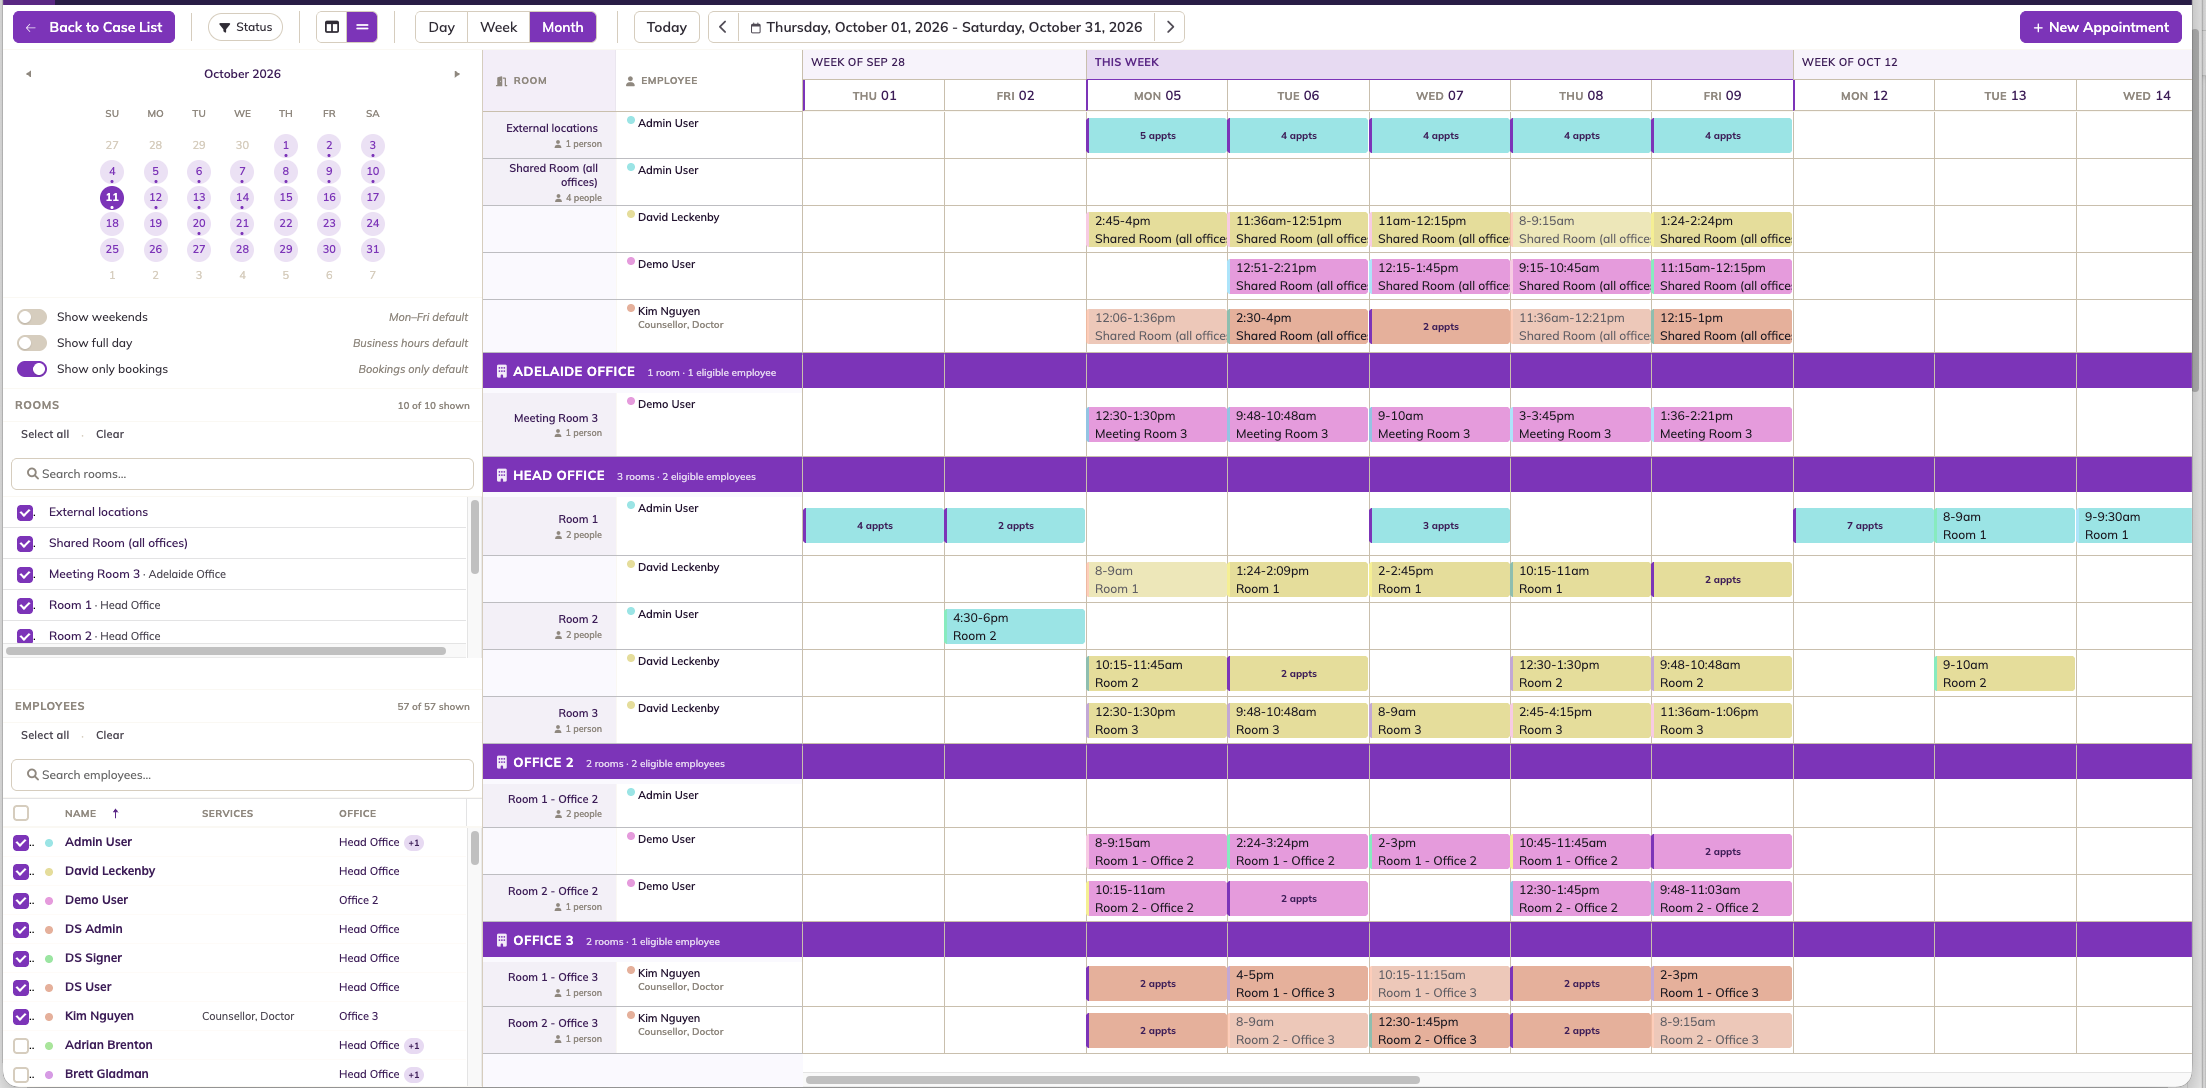
- Month, Horizontal groups a day's appointments in the same row into one tile, such as 3 appts.
Week view, Horizontal layout
Week view, Vertical layout
Month view, Horizontal layout
How rows are grouped in the Horizontal layout
Rows are grouped by office, then room, then employee. Each office's heading shows how many rooms and eligible employees it has, such as 1 room · 1 eligible employee.
An employee is only shown alongside rooms in their own office, so a Perth consultant never appears under a Sydney room. There are two exceptions:
- Shared rooms: a room with no Location is shared by all offices. Shared rooms are listed after your offices, alongside employees from every office. See Rooms.
- External locations: appointments that have no room, such as appointments at a client's address, are shown in the External locations row.
Display options

- Show weekends: Week view shows Monday to Friday by default. Turn this on to include Saturday and Sunday.
- Show full day: by default, the Scheduler shows business hours (8:00 AM to 5:00 PM). Turn this on to see the whole 24 hours.
- Show only bookings: in the Horizontal layout, this hides each employee's row under a room when they have no appointments in that room in the dates shown. It's on by default. Turn it off to see every employee under every room they can be booked in, for example to find someone who is free.
A line marks the current time, and the mini-calendar stays in step with the date you're viewing. Times when an employee isn't available are shaded darker, see Employee availability and colour.
Filters
- Employees: tick the employees to show. You can search the list, sort it by any column, or use Select all and Clear. If no employees are ticked, the Scheduler asks you to select one or more.
- Rooms: click a room to show it, and again to hide it, or use Select all and Clear. Each room is listed with its office, and the heading shows how many rooms are shown, such as 10 of 10 shown. A search box appears when there are more than six rooms. The Rooms list is hidden if no rooms are set up.
- Status: click Status on the toolbar, then tick the appointment statuses to show, or use Select all. For example, untick Cancelled to hide cancelled appointments.
- Offices in scope: this line shows which offices are in your current view. It's for information only and doesn't filter anything.
Your filter and view choices are saved in your web browser, so they're kept the next time you open the Scheduler on the same computer and browser. On a different browser or computer, you'll start with the default view.