Export invoices to Xero

Invoices are exported to Xero in a simple process.
There are four main steps:
- Create a journal entry that includes the required invoices.
- Click Export at the bottom of the journal entry.
- Select your export options and export the invoices to Xero.
- Go to Xero, where you will find the invoices as draft invoices, ready to be approved.
Occasionally you may need to examine the export log and address any issues it identifies.
Before you run this process for the first time contact Supportto set up the technical connections between your Case Manager database and your Xero database. You should also read through Integrate with Xero: invoices to familiarise yourself with the details.
1. Create journal entry
Select View > Journal Entry List from the main menu![]() icon
icon
Create a journal containing a targeted batch of invoices that you want to export.
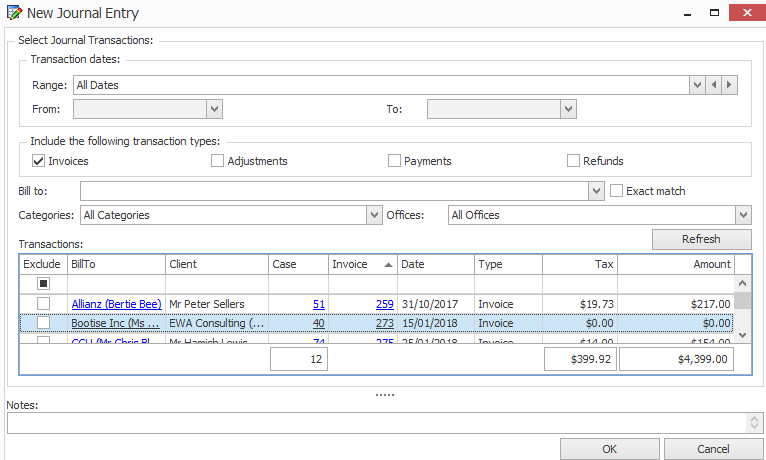
Full instructions for creating journals are at Create journal entry.
2. Initiate the Xero export
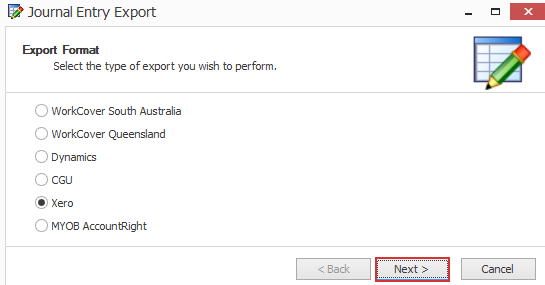
After creating the journal click Export at the bottom of its tax summaries.

Select Xero and click Next >.
3. Select export options
These options relate to invoice mappings, see Invoice mapping between the two systems for details.
- Click this option to add cost dates to Xero line item descriptions.
- Click this option to add cost notes to Xero line item descriptions.
- Click this option to add cost charge code to Xero line item descriptions.
- Click this option to export cost charge codes as Xero line item inventory codes.
-
This setting applies to invoices where the invoice contact has a company with no name.
If set the Xero contact name will be the contact's surname, followed by a comma and then their first name.
If not set, the Xero contact name is the contact's first name followed by their surname.
See Invoice mapping between the two systems at the item marked with A.
Note that they must match existing, functional Xero inventory codes.
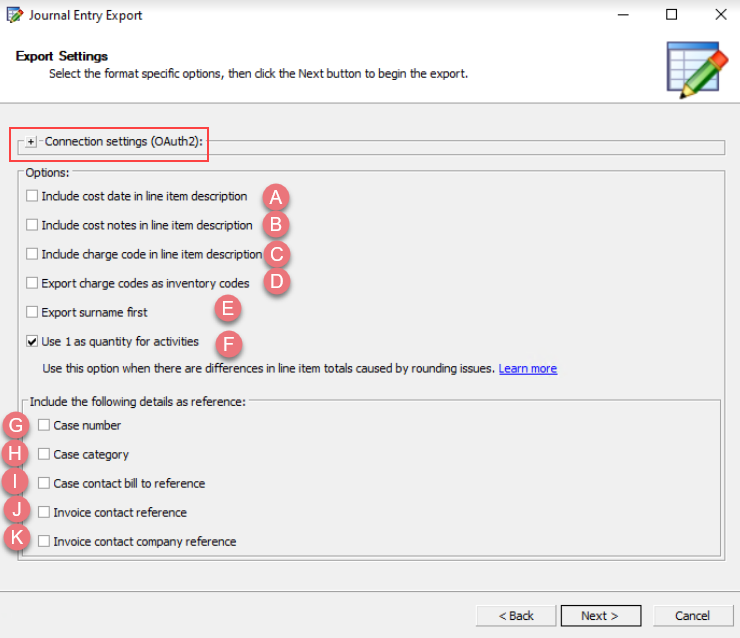
- Click this option to use Xero export rounding, as explained below.
The second batch of options refer to information that can be included in the Xero Reference field to help you clearly identify the connections between Case Manager and Xero. If multiple options are selected the information is concatenated in the order displayed, with a hyphen between each one.
- Click this option to include the invoice's case number.
- Click this option to include the invoice's case category.
The last three options refer to the inclusion of a Case Manager Reference field in the Xero Reference field. In Case Manager this field is set at the company level and independently at the contact level, see Shared contact fields for further details.
- Click this option to include a reference to the case's Bill To contact.
- Click this option to include a reference to the invoice contact.
The invoice contact is normally the case's Bill To contact but not always, so both options (H and I) are offered here.
- Click this option to include the Reference of the invoice contact's company.
Note that the Connection settings (highlighted) are also accessible on this screen. You do not need to access these once they have been set up by Chameleon Support.
Once all export options have been selected click Next> to start the export.
When invoices are exported to Xero, Xero recalculates the invoice line item totals and their GST amounts as new, rounded results.
Usually this does not cause any issues. However, the process is susceptible to rounding errors that change the invoice's GST by a very small amount when compared to Case Manager.
A mismatch between Xero and Case Manager's invoice data makes the export process fail. An error message in the log informs you that validation has failed.
A solution is to send data to Xero so that activity costs have a quantity of 1 and a rate equal to the invoice line item total. This stops Xero from doing any calculations that can lead to rounding errors.
To use this solution simply tick the option at F above.
4. Export is underway
The export progress is monitored onscreen with a log:
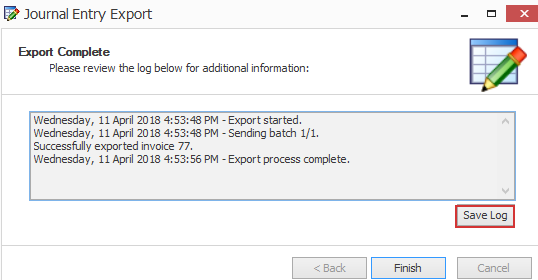
When the process has completed you can scroll up and down to study the log.
You can save the log into a text file by clicking Save log.
Click Finish to complete the process.
Note that Case Manager will prevent you exporting invoices that have previously been exported:

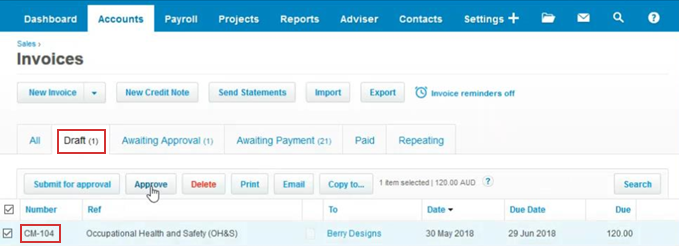
5. Approve the invoices in Xero
You can now go to Xero, where you will see the successfully exported invoices as draft invoices, with CM appended to their invoice numbers.
The final step is to approve the draft invoices.
Export log and errors
The export log lists the invoices successfully exported and reports any exceptions (errors) reported by Xero that prevent it accepting particular invoices.
After Case Manager sends the batch of invoices Xero replies with information about any invoice exceptions (errors) it finds. Case Manager reports these messages in the export log.
There are very few reasons for invoice exceptions.
One possibility is that you specified at step 3 above that charge codes should be exported as inventory item codes and the invoice contained one or more charge codes that did not match any Xero inventory codes:

Another possibility is that once again you specified charge codes should be exported as inventory item codes and these are not set up with all required details in Xero:

If the error is due to Xero and Case Manager invoices not having exactly the same data, there is a solution: an export option. See Xero export rounding above.
Mixed batches
Note that if a journal entry contains some invoices that fail in the export it is possible to correct the invoice details and re-submit the journal. Case Manager will ignore the invoices it has already successfully exported and simply send the others.
