
Choose list columns
Grids/lists feature throughout Case Manager. There are tools to manage the list itself as well as tools to manage items in the list. The Case List has access to most of these tools, see Case List as a grid.
You can choose the fields that are displayed as columns in the list. The available options vary. For example in the Case List you can display a Bill To column while in the Documentation list you can display a column with the document's author.
The Case List does not have the column choosing function described below on this page. You manage its columns with the sophisticated column options in the Case List Criteria.
Column chooser list tool
To use the column chooser function click its icon  .
.
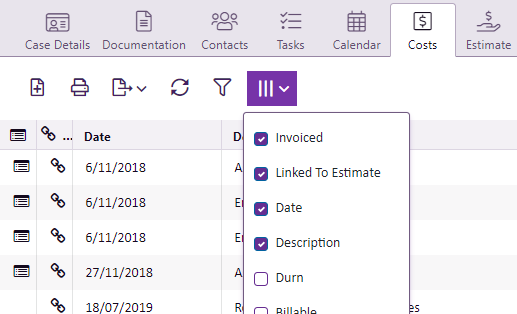
Click the checkboxes for the columns you wish to display.
You can reorder columns by dragging their headings left or right in the header row.
You can change a column's width by placing the cursor at its right side in the heading row and dragging left or right.
