Report Designer for invoices
The following instructions explain how to make modifications to your invoice template in Report Designer, as introduced in Change the invoice template with Report Designer.
Instructions for simpler, more generic Report Designer modifications to template for all accounting transactions: payments, adjustments and refunds - start at Simple template modifications using Report Designer.
The instructions on this page use the default invoice layout template. If your template has already been modified, it may look a little different but the principles are the same.
We suggest that you read through the instructions first before attempting, for example, to Add logo to template (step 7) or Add banking details (advanced section).
If you have trouble with Report Designer, you can save your invoice template to a file. We can assist you if you email it to Case Manager Support, along with a sample invoice to show how you want it to look. If you need a new image added to the template, such as a logo, you should also attach that file. We can then make the changes for you and email the updated template file.
Video
Video demonstration of basic operations in Report Designer.
Simple changes using Report Designer
You start Report Designer as part of changing the invoice template for a company or category, or to change the global invoice template.
To start it up go to the Global invoice template, Category invoice templates or Company invoice templates.
Click the Use custom invoice report layout checkbox and click Edit Layout.

This opens Report Designer with your invoice template loaded.
Report Designer has a number of powerful features and its IT-orientation makes it look complex. But do not be alarmed. There are a number of simple things that you can do here.
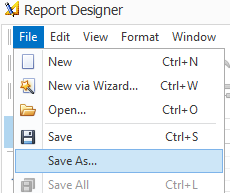
- The first thing to do is to select File >Save As from the main menu and save a copy of the current template to your own computer.
- The next thing is to understand that you are now viewing all of the possible heading and line item fields that were offered when you chose which header and line item fields you wanted to include.
- Even if you are starting this template from scratch, the standard format is divided into regions and populated with fields and text that are almost always organised in tables. The tables hold related information together and align it on the invoice page.
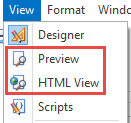
- You may be tempted to select View >Preview or HTML View to study your template but be aware that these do not give the results that you expect, so do not select them.
- If you look on the right hand side window you can select the Report Explorer tab to view the Report Explorer. All the items on the page and their hierarchical relationships (including membership of tables) are also specified here.
- Company details
- Invoice heading
- Invoice details
- Invoice line item(s)
- Line item totals
- ReportHeaderTable, containing the company details
- HeaderLeftTable and HeaderRightTable, containing all the heading fields
- InvoiceDetailsTable, containing the invoice details
- DetailHeader is the heading for the invoice line items.
- DetailFooter contains the totals at the end of the invoice.
- To demonstrate how an entity contains further levels of detail, below we have selected the triangle next to ReportHeader to open it up. We can close it by selecting its tilted triangle.
- To add an image such as your company logo to the template, select the Picture Box icon from the tools menu and drag out a picture box where the image will be placed.
- To add ordinary text to the template select the Label tool and drag out a text box.
- When you have finished modifying the invoice template, select the disk icon from the menu and save the template. You could also do this as you work.
- Select the close icon at the top RHS of the Report Designer window to close the program.
Thus, if you accidentally destroy something important in the next steps, you can easily open the template file and begin again.
You can also use this saved template file as the foundation for category and company templates or to email us if you need help.

At the end of the session when you click the close icon to close Report Designer, you have the option to save your changes to the Case Manager template.
You have probably seen such merge fields in the standard document templates inside double arrows, e.g. <<ClientFullName>>. They instruct the system to get the named piece of information (field) from the database.
Here you see the merge fields inside square brackets, e.g. [ClientFullName], instead of double arrows.

And you see all of them here, even though your invoices using this template will only display the fields whose checkboxes you selected. For example, you may not have selected the client’s phone number to appear in the invoice heading, but you will see the field here.
Note that even though you don’t want to see them on invoices, do not delete unwanted fields here in Report Designer because they are used elsewhere by the system. If you do this accidentally, open your saved template (step 1) and start again.
If you explore the template you can see that many fields, e.g. [ClientFullName] are paired with an explanatory label (in the example below it is “Client”). The pair are organised into a row of a table that contains other rows holding related information.
You can select a label text (e.g. “Client”) and edit it and/or change its style using the standard word processing functions on the top menu.


You can select the triangles to open or close levels of detail in the Report Explorer.
Note that you may not have triangles and instead have other icons here, depending on the Appearance you have selected for Case Manager. For example, you would see plus and minus icons if you had the Coffee appearance loaded:

You can see below that InvoiceReport is linked to Styles, Formatting Rules and Components . These are all aligned at the same vertical position (indicated here by a red line).

You can also see that InvoiceReport is composed of a top margin, a report header, a page header, a detail header, detail, costs details, a details footer, a page footer and a bottom margin. These components are all aligned at the same vertical position (also indicated here).
A number of these components are in turn composed of other entities. You can see this because there is a triangle next to them, indicating that there are further levels of detail.
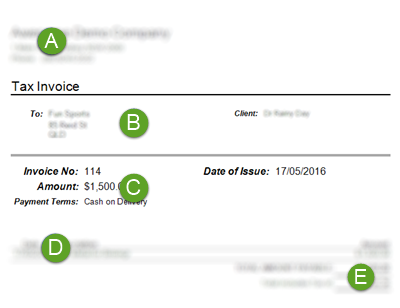
We saw in Heading and Line Items that the main parts of the invoice template are:

These correlate with the entities we see in the Report Explorer:
A, B and C are collected together into the ReportHeader.
PageHeader is empty
Detail is empty and CostsDetailReport contains the line item details.
PageFooter contains an empty table. This is used to do automatic page numbering.
BottomMarginBand1 sits at the bottom.
We also selected the triangle to open HeaderRightTable, the table on the right hand side of the header that holds information about the client and the case.
We then selected its triangle to open its first row, ClientTableRow.
You can see that there are no further levels here. We selected the second cell in the row, ClientTableCell item, so the contents of that cell, the field named [ClientFullName] is also highlighted on the page.

Thus, when you select an item in the Report Explorer, it also highlights on the page. You can select a table, a row or a cell this way. You can also directly select it on the page.
Once selected, each of these can be resized or moved using standard editing tools and subject to the usual conventions for tables, see the video for a demonstration. They can also be formatted using either the word processing tools at the top of the menu, the tools in the Property Grid window or by modifying the styles in the Report Explorer.

Select the > icon at the top RHS corner of the picture box.

Select the row of dots and browse for your image.

By default, the Sizing is set to Normal, so you will see as much of the image as will fit into the picture box. If the image does not fit in the box, you can set the sizing to Zoom Image, which will shrink the logo to fit the picture box and also retain its aspect ratio (proportions). If there is enough room on the page, you could also set the sizing to Auto-size. This will resize the picture box so that it is as big as the logo’s actual size.
See the video for a demonstration where a logo is added inside the ReportHeader. Naturally this also adds an entry that you can see in the Report Explorer window.


The text box starts by containing standard text, as below. Select the text in the box to edit it and also format it, as previously described.

You can move or resize the box using standard tools.
You could also create, edit and move text with the Rich Text tool.


Note that once you save a modified template this affects all relevant invoices in the system. Obviously it can't change any PDF files already created from invoices, but it will change the invoices themselves.
Note also that the best way to preview your changes is to choose a suitable invoice in the Accounts tab of a case and select Print Invoice > Preview Window.
More challenging modifications to the template
- To extract an extra piece of information from the database and add it to the template, select the Field List tab to open the Field List window. This shows all the database fields that you could choose.
- Another way to add information in the database to the template is to select an existing text box and the select the > icon at its top right hand corner.

Drag the required field from the window and drop into position to the page. This also adds an entry to the Report Explorer window. You may want to increase the size of its box on the page, in order to accommodate the possible lengths of any text stored in this field in the database.
Note also that each time you select a merge field in the template it is also highlighted in the Field List window when this window is open.

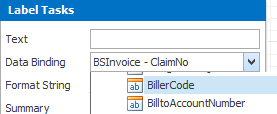
Select a field from the Data Binding dropdown. You are selecting from the same list that you saw in the Field List window.

This action replaces the text box contents with the selected field.

Adding banking details
A common requirement is to add banking details for your company at the bottom of the invoice. This would go in the PageFooter of the template.
You could enter the information as text, as described at step 8 above.
An alternative method is to enter the bank information in Case Manager and 'tell' the invoice template to retrieve it for the office linked to each invoice.
To set this up select Lists > Other Lists from the main menu and select Office from the List Type dropdown.
For each office enter the account number in Number, the BSB in Code, the ABN in Bus Num and the account name in Name.

Back at the Report Designer, open the Field List window as described at step 11. Locate OfficeAccountNumber, OfficeAccountCode,OfficeBusinessNumber and OfficeAccountName. These hold the banking information that you entered.
We saw a reference in step 5 to the PageFooter. It currently contains an empty table with an attached script so that the table displays page numbering for invoices.
Drag the dotted line at the bottom of the page downwards to make the footer big enough to include another similar-sized table.

Select and hold the top left corner of the empty table and drag it downwards so it sits on top of the newly-moved dotted line.

Select the Table tool and drag out a new table in the newly-created space above the empty table

You can change the number of rows and cells in the new table by right-clicking the table and using standard table management tools. Set the table up as required and enter text in the appropriate table cells.
Select the > icon at the top RHS of the appropriate cells in the new table and follow the instructions in step 12 to use Data Binding to add database fields to the cells .

When an invoice is printed using this template the footer displays:

