Excel documents overview
Case Manager works well with Excel and such documents can use both templates and merge fields. This enables the creation of spreadsheets containing customised information taken directly from the case.
Preview Excel documents
If you want to be able to preview Excel documents within Case Manager, you can tick Show document preview at the Documents tab of the system options. This is located by selecting Tools > Options from the main menu.

A preview of the document is displayed at the bottom of the Documentation tab when the document is selected.
Create Excel document
This process is the same as for creating Word documents. Obviously you choose an Excel template to start with. The first step involves selecting the template and saving the new document, after that you go into Excel to edit and save the document, see Create Word document.
These documents are not stored inside the Case Manager database; they are in a file sharing area so that other programs (e.g. Word or Excel) can potentially have access. We call them linked (or locked) files.
Create Excel template
Instructions for creating Excel templates are at Other templates.
Export grids to Excel
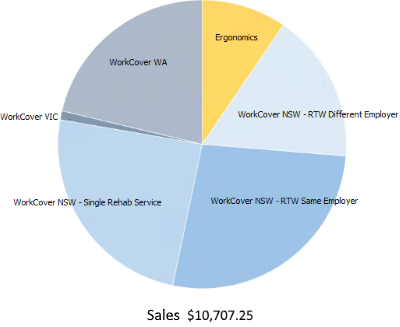
The contents of Case Manager grids can be exported to an Excel file. Be aware that there are several important system options that apply to the exported data.
Once in Excel, the data can be further manipulated using Excel's formulae and other powerful features.
The data can also be visualised in a number of ways using charts and shapes. For example, Case Manager data exported to Excel is expressed below as a simple pie chart.