Custom reports
It is possible to create new reports designed for specific business requirements. Once created, users with permission to see them will find them listed amongst the standard reports available after selecting View > Reports from the main menu![]() button
button
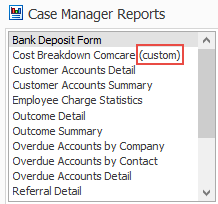
As with other reports, you can apply style sheets to the report output then preview
Custom reports are created by Case Manager support or, if you have SQL skills
Custom report utility
To use this utility you need to understand SQL so that you can write the queries necessary.
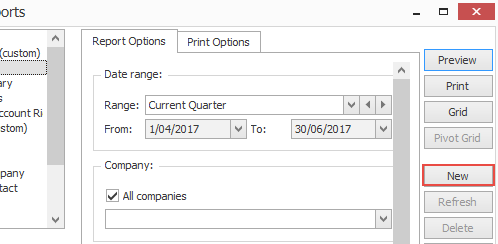
To launch the Report Wizard click the New button on the Reports screen.
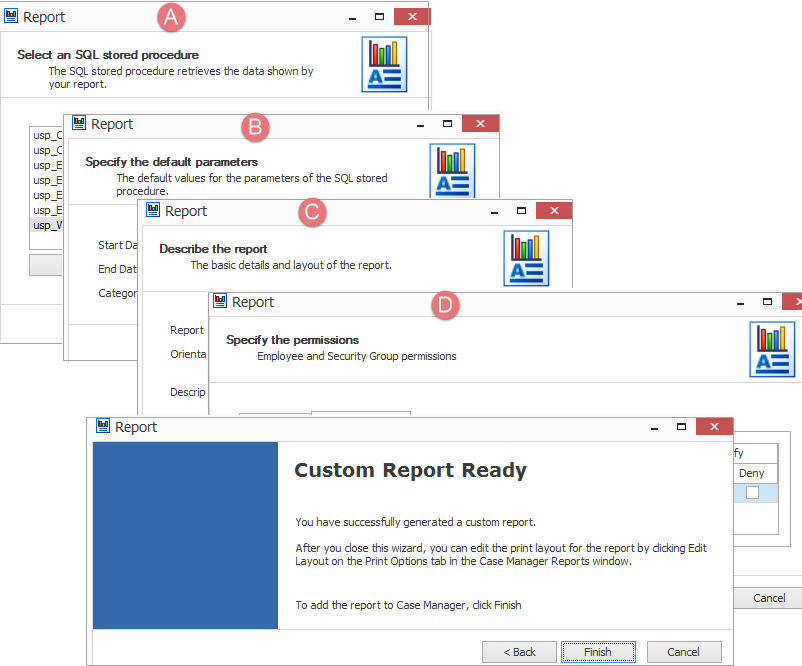
As indicated in the screenshot sequence below, you will be required to:
- choose from a list of pre-designed SQL stored procedures,
- enter its default parameters,
- describe the report and
- specify its permissions, see Report permissions below.
Notes:
- Reports are created from existing data sources (tables, views or stored procedures).
- Output can be directed to either the print preview window or a grid.
- Results from either output can be exported to other formats such as Excel, Word, PDF, etc.
- Parameters are supported when stored procedures are used as the data source. A data entry form is automatically generated for entering parameter values.
After you have clicked Finish, you can locate the new custom report in the Reports screen and edit its print layout by clicking the Print Options tab and then clicking Edit Layout. This opens Report Designer where you can modify the layout. This is the same editor as is used for accounting transaction layouts, such as invoices, see Simple template modifications using Report Designer.
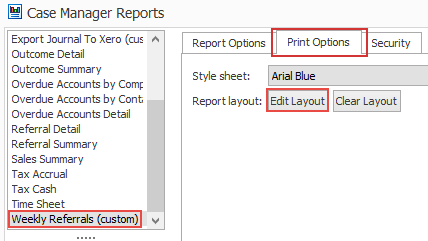
You can also access or modify its permissions directly via the Security tab.
Custom report permissions
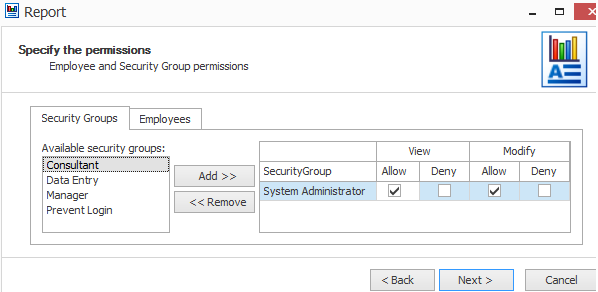
When you specify the permissions you are controlling user access to the new report: who can view and/or modify it. The permissions that you set at this screen will also be accessible at the Security Group List because both provide access to the same system permissions data.
Managing permissions for custom reports is very similar to managing security permissions at the Employee List, where you can make a user a member of security group(s) and also give them specific permissions. So permissions can be set at two levels, with the first being greatly preferable to the second.
Similarly, you can set access to custom reports at two levels:
- You can make a custom report available (view/modify, etc) to any user who is a member of a security group.
- Additionally you can assign access to a custom report directly to particular users.
You can link multiple security groups to the custom report and each can have a different access (view/modify, etc), see Types of access below.
Security groups are defined in the Security Groups List and users are added to them at the Employee List.
It is much better practice to assign permissions via security groups rather than via specific individuals. Individual access is very difficult to maintain when you manage a larger number of employees and must handle situations such as an employee promotion or their departure from your business. You should only assign access directly to employees if you have very few employees or if a requirement is specific to only one employee.
Types of access
You set both the view and the modify permissions for the custom report.
You usually need only be concerned with the Allow checkbox for both of these.
View the custom report
- If Allow is ticked the output of the report in any format (preview, print, grid, pivot grid, csv file, text file) will be seen by the user. If this is not ticked, the report output cannot be seen by the user.
Modify the custom report
- If Allow is ticked the report can be changed by the user. They can refresh the data source to modify the report and also edit/clear its layout. If this is not ticked, the report cannot be changed by the user.
Note that these values are subject to the Compilation of permissions, see below.
The Deny checkbox overrides any Allow permission (including for the System Administrator security group) and is relevant when multiple permissions are collected and compiled for the same user, as detailed below.
Set access security

To set access via membership of security groups follow these steps.
- Click the Security groups tab.
- Select a security group.
- Click Add >> to add the group to the access list on the right.
- Click the appropriate checkboxes for View and for Modify access. They apply to users who are members of the security group, subject to the Compilation of permissions.
You can add multiple groups to the list, with different access settings.
You can add specific access settings for individual users through the Employees tab. Follow the same steps as above, keeping in mind the advice to do this rarely, if at all, as explained above.
Compilation of permissions
When a user is a member of multiple security groups, Case Manager evaluates each permission by collecting the values for this permission in all of the user's security groups. These are compiled into one value per permission using two rules:
- If a permission has an Allow value in any of the security groups, this permission is collected into the set of Allows, i.e. allowable actions for the user.
- It is ejected from the set of allowable actions if a Deny value for this permission is located anywhere.
Note that when a value for the permission has been set per user, this value is also collected into the process described above and is subject to the same rules. Thus, it does not override settings for permissions in the user's security group(s).
Be aware that ticking the Deny box for a permission overrides any Allow permission set for a security group (including the System Administrator security group) or for a user.
General permissions for custom reports
A separate set of permissions at the Security Groups List regulate custom reports generally:
- View custom report
- Modify custom report, Add custom report, Delete custom report
This specifies whether custom reports are displayed to the user in the list of available reports.
These relate to whether the user can use the custom report utility to make changes.
