Overview of grids/lists
You can think of any Case Manager grid as a kind of list: a list of documents, a list of contacts, a list of costs, a list of activities, and so on.

One record in the list can be selected at a time (one document, one contact, etc) and the details of this record are displayed below or to the right of the list. These details can usually be modified and the changes saved.
Individual members of the list can be deleted and new members added.
Thus, the grid/list is a filing system but with extra 'powers', including tools that you may have already encountered in spreadsheet software. These extremely powerful tools help you create, display, organise, filter, sort and manage information.
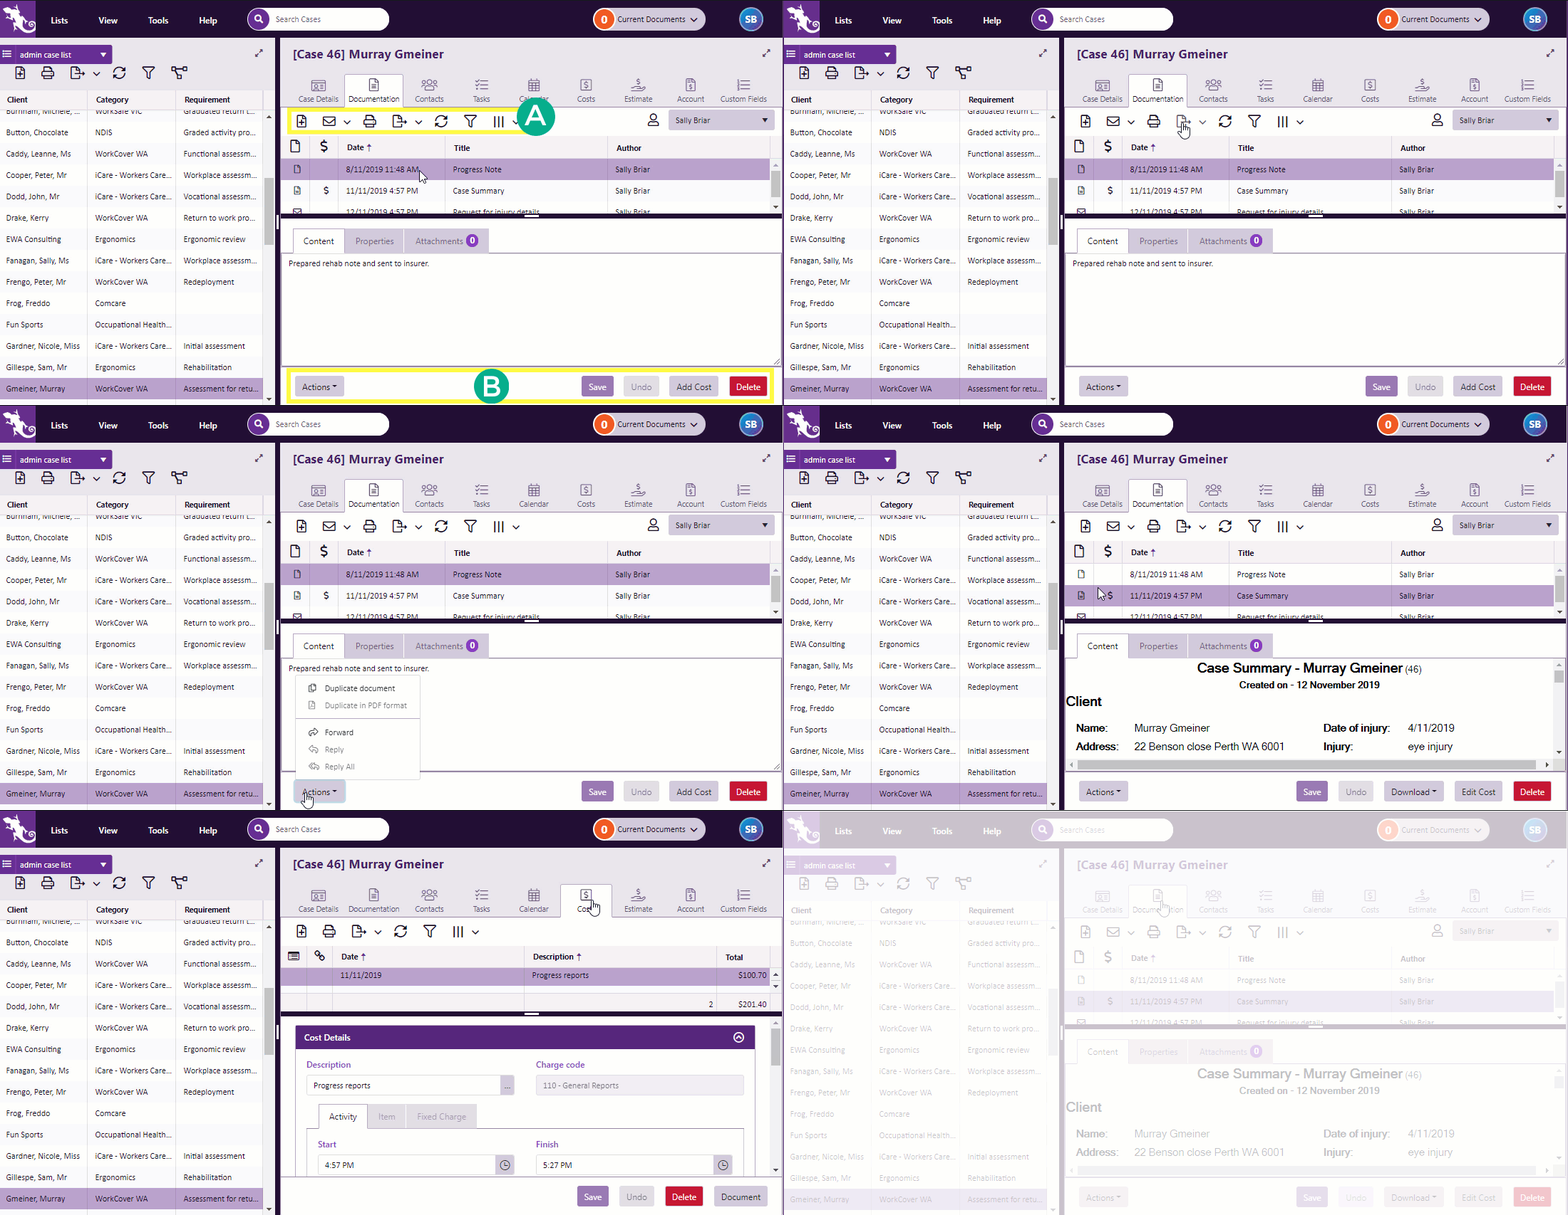
As shown below, there are tools to:
- manage the list itself
- manage items in the list
Click image to see all the list functions in the Documentation grid. Click again to close.
The Case List also has access to most of these tools, see Case List as a grid.
Grids work in a consistent manner so that once you have learned to operate them in one Case Manager screen you can use similar techniques elsewhere.
Grids feature throughout Case Manager, for example, in case tabs, various Case Manager Lists, e.g. the Activity List, the list of Tasks, where you manage your work as a list of tasks and the Journal Entry List.
The mother of all grids is the list of cases, the Case List (also called the Case Selector). The Case List has the standard grid tools as well as extra, customisable grid functions provided by the Case List Criteria, see Case List as a grid.
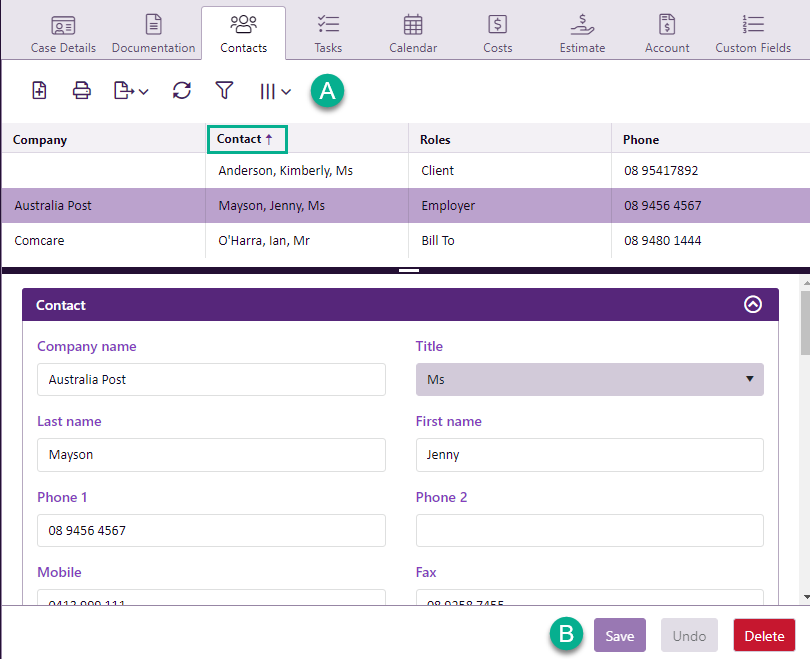
Below we see a grid: a list of case contacts in the case's Contacts tab. Each row is a separate member of the list. The second row has been selected and its details are displayed beneath the list.
Each row displays several contact fields: company name (if it exists), contact name, contact roles and phone number.
- These fields are displayed in columns identified by headings.
- Here the rows are sorted alphabetically by the value of the contact's name, from lowest to highest.
The

The grid tools are separated into buttons for:
- managing the list, such as filtering, grouping or exporting the list
- managing the items in the list, such as deleting the selected item
See List tools, for details.
See Item tools for details.
For example, above Undo, Save and Delete are at the bottom of the screen, next to the item that they affect, while icons for filtering and printing the list itself are at the top of the screen.

