
Send email
Once you are set up, you can send, forward and reply to emails at a case's Documentation tab.
The set up includes setting your email, your signature for blank emails (if required) and your email server details. The server details depend on which version of Case Manager you are running and what kind of email server you are using. See Email server configuration: an overview.
Once set up, emails will be sent from your own email address, which is stored at the Employee List.
You can create a blank email, starting with an email signature (the global signature) or your personalised signature, see Email signatures.
Alternatively you can create an email from an email template. This usually starts with more information in the email, including opening and closing text and case details inserted via merge fields. It can also start with case email addresses already in place, such as the insurer's email address, as specified in the template. See Email templates.
You can attach case documents to emails, as well as other files on your computer.
You can also send an email as another user. This uses the other user's email address, merge field values and email signature, see Create document on behalf of another user.
Note that emails that send invoices are a special kind of email. They are sent from the Account tab or in a batch using the Invoice Batch Utility. Specific invoice email settings are applied to them, including the from address. See Email invoice for all details.
Once you have sent an email or saved it as a draft, it is displayed in the Documentation grid. Invoice emails and their attachments are also displayed there.
In the grid the email subject is the document title. You can view the sender and recipients, the contents of the email, its properties, its details, a list of any attachments and the attachments themselves, whether it is a draft email, etc. See Emails at the Documentation tab.
A sent email file is locked by default. It can be unlocked and deleted if required, see Email locking.
Send new email
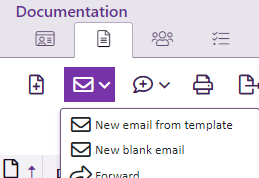
- At the Documentation tab click the Email button and choose whether to create a blank email or to create an email from a template.
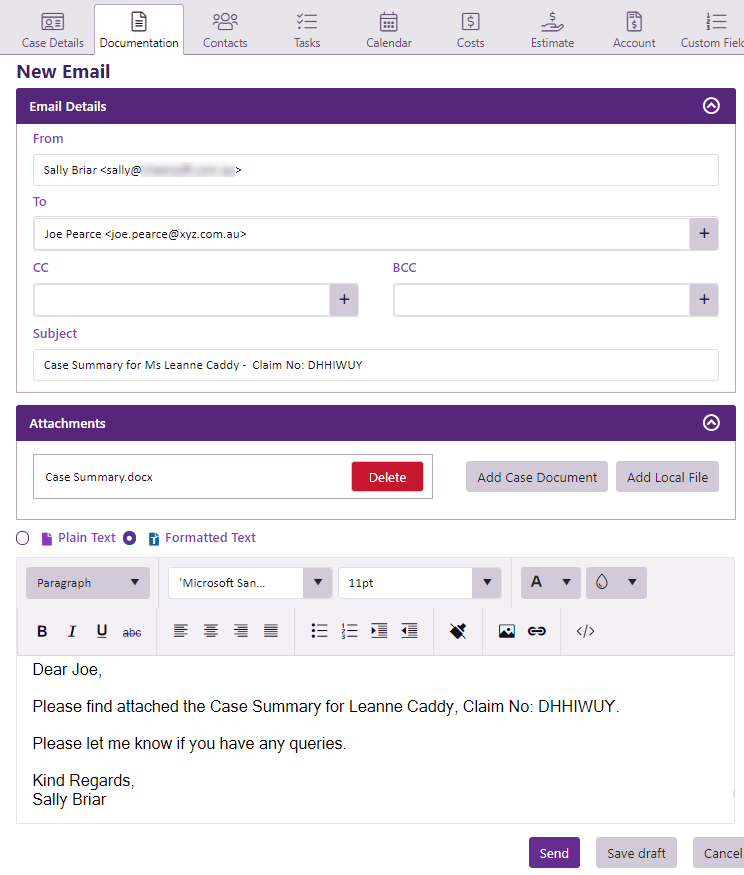
- The email will be sent from your email address, which is stored in your user/employee record in the Employee List.
- Enter the email recipient(s) details.
- If you used a template the email may already have a subject, i.e. the title of the email, and contain text including case information.
- You can attach documents by clicking the Attachments paper clip, see Attach document to email below.
- Click Send.
If you chose to use a template select it from the list.
An email signature may be automatically added, depending on your user settings.
You can type them in or select them from the case contacts with email addresses.
To do this click the
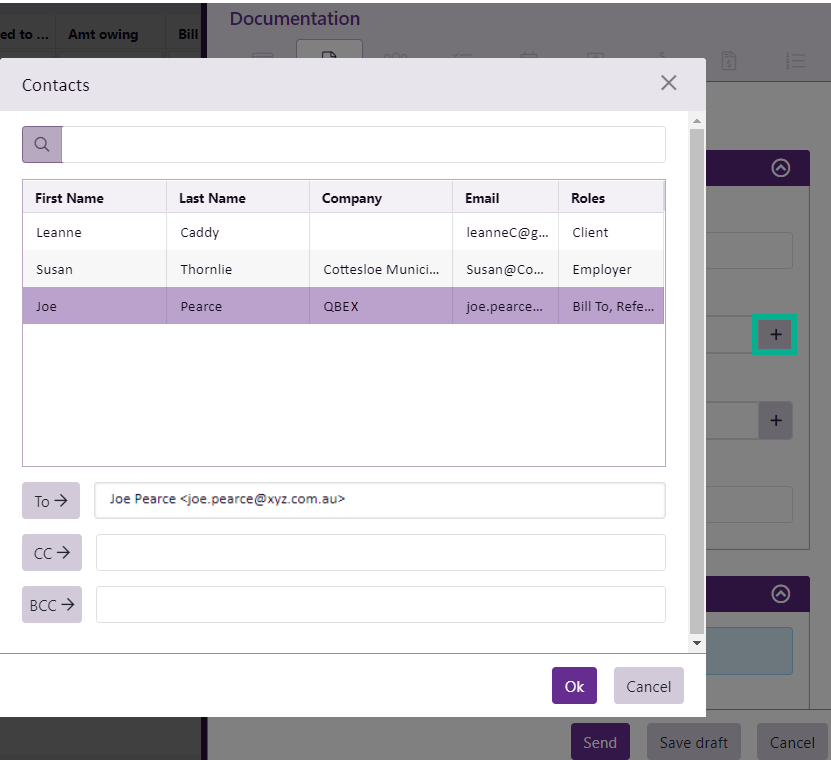
Note that when the email template contains role-based email addresses, the email addresses of your case contacts with these roles have been automatically added to the email.
Enter the remainder of the email text.
If you chose a formatted text template you can apply formatting (fonts, styling, etc).
The email window remains open until the email has been sent.
- Note that instead of clicking Send and sending the email, you could also click Save Draft to save a draft of the email to send later.
A column in the Documentation grid indicates whether an email is a draft or was sent.
Attach document to email
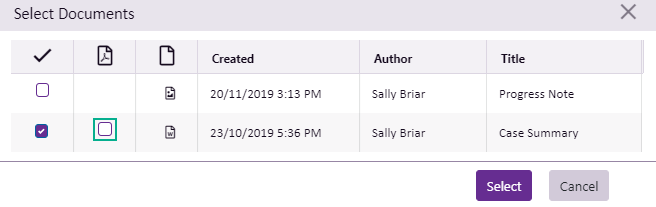
You can attach one or more documents from the case document list or from your computer's local folder.
When a Word document is selected from the document list you can choose to attach a PDF version of the file. The original Word file in the document list is unchanged.
Virus scan of attachments from your computer
This feature is available to our customers who are hosted by Chameleon Software. When you attach documents to emails from outside Case Manager they are carefully scanned for viruses, see Virus scan of uploaded documents for details.
Reduce Word file size before attaching
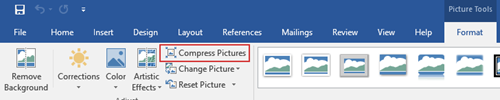
You have probably noticed that when you add images to a file it can quickly become quite large. One way to manage this is to reduce the size of these images without losing essential information.
To do this in Word select an image, click the Format tab and then click Compress Pictures. You can compress this image or all images in the document at the same time.
Email attachment storage
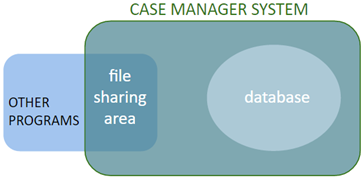
Email attachments are no longer stored inside the Case Manager database with the case information, accounting records, and so on. Instead they are stored in the file sharing area of the system with linked files, such as Word documents. This helps keep your database to a more manageable size.
An older video about sending an email.