
Standard reports
To run a standard report, select View > Reports from the main menu.
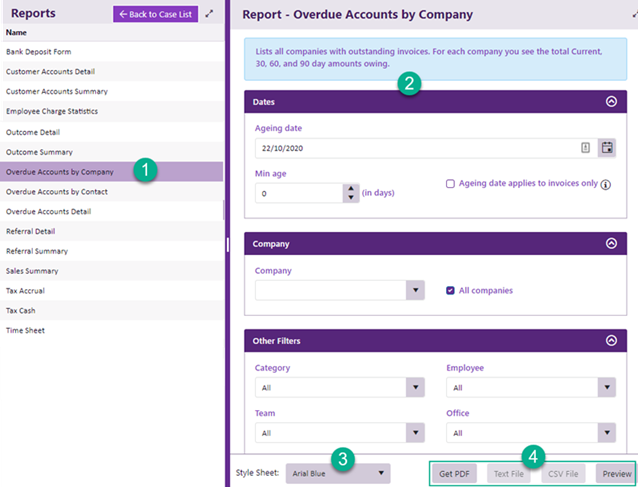
- Select the desired report.
- Each report has filter specifications that you can set.
- You can also set print options for most reports
- Select the output format for the report.
Types of reports
The following standard reports are available:
Costs
|
Time Sheet |
Prints a summary time sheet for one or more employees over a specified date range. Displays the total hours worked for each day plus a final total for the week. Times can be broken down by activity if required. This report displays only the billable information. |
|
Employee Charge Statistics |
The Employee Charge Statistics report is a customisable costs report. Unlike accounts reports below, this report can include all cost data, including unbilled and non-billable costs. It can be filtered by case information as well as by cost information. The report displays an employee's chargeable hours, optionally broken down by day, month, year, activity, team, office, category, company or case (client). The report allows you to compare hours and charges to an employee's base rate. This powerful report is appropriate for many requirements, see Employee Charge Statistics report for more details. |
Customer accounts and sales
|
Customer Accounts Summary |
Lists a summary of account transactions for one or more customers, i.e. one or more companies Has the same options as Customer Accounts Detail (below); report data is summarised by transaction type for each company. |
|
Customer Accounts Detail |
Lists all the separate account transactions for one or more customers You specify:
and whether cases are linked to:
You can also specify whether to include draft invoices and closed cases. You can limit the report to particular transaction type(s), selecting from: invoices, payments, adjustments and/or refunds. |
|
Sales Summary |
Monthly sales figures calculated from invoice totals. By default adjustments are also included in these figures but you can exclude them. You specify:
and whether cases are linked to:
The default setting excludes draft invoices but you can include them if required. Report options enable you to specify which month of the year should be listed first and whether tax should be excluded. |
Tax
|
Tax Cash See GST and VAT for more information about this. |
Summary of tax collected (e.g. GST, VAT) for a specific date range. This report is calculated on a cash accounting method. There is an option to report on a number of different time frames (i.e. quarterly, monthly, yearly or a custom range.) Other filters include category, employee, team and office. |
|
Tax Accrual See GST and VAT for more information about this. |
Summary of tax collected (e.g. GST, VAT) for a specific date range. This report is calculated on an accrual method of accounting, that is, the figures are for all invoice transactions during the defined period. There is an option to report on different time frames (i.e. quarterly, monthly, yearly or a custom range.) Other filters include category, employee, team and office. |
Banking
|
Bank deposit form |
Bank deposit form for a specified date range. |
Overdue accounts
These reports display the outstanding (unpaid) invoices at the ageing date.
You have two options:
-
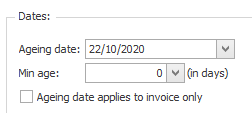
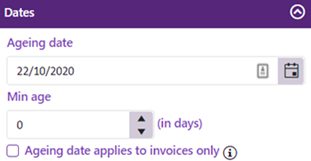
You can specify that the ageing date applies to all transactions.
-
You can specify that the ageing date applies only to invoices.
Any transactions created after this date are excluded from the calculations.
Any invoices created after this date are excluded.
For the invoices that are included, all adjustments and payments associated with them are also included in the calculations, even if these transactions were created after the ageing date. All other adjustments, payments and refunds created after the ageing date are excluded.
This is useful when, for example, you only want to report on invoices that were raised in the previous month, but you still want to include any adjustments and payments that have been entered against those invoices in the current month.
The age of an invoice is the number of days between its creation date and the Ageing date. Enter the minimum age for invoices that should be included.
Note that overpaid invoices appear in these reports as unpaid (amount owing is not equal to zero) so that you are made aware of them and can rectify the situation.
|
Overdue Accounts by Company |
Lists all outstanding invoices for one or more companies. For each company you see the total, current, 30, 60, and 90 day amounts owing. Report can filter by category, employee, team and office. Closed case transactions and draft invoices can be excluded. |
|
Overdue Accounts by Contact |
Lists all customers with outstanding invoices Has the same filter options as above. For each contact you see their total Current, 30, 60, and 90 day amounts owing. |
|
Overdue Accounts Detail |
Lists all customers with outstanding invoices For each customer you see the amounts owing as well as Bill To contact person and phone number for each case, so you can contact them easily to follow up the outstanding amounts. Has the same filter options as above. Other fields available in this report include claim number, the invoice number and date, the case number and client. |
Referral and outcomes
|
Referral Detail |
Lists the referrals for each referrer, showing: bill to, employer, client, requirement, delay to referral, duration and cost. Can be filtered by date range, referrer and/or date, with the option to show open cases only, closed cases only or both. |
|
Referral Summary |
Summary of referrer performance, showing: referral count, average delay to referral, average duration and average cost. Can be filtered by date range, with the option to show open cases only, closed cases only or both. |
|
Outcome Detail |
Lists the type of outcome for every closed case, also showing: client, employer, delay to referral, duration and cost. You specify:
and whether cases are linked to:
This report provides detailed information for each case. Note that if a case does not have a date in the Date Closed field in its Case Details tab, it is not considered a closed case and will not appear in this report. |
| Outcome Summary |
Summary of outcomes for closed cases, summarised per outcome. Has the same options as Outcome Detail report. This report provides an overview of closed case outcomes, showing per type of outcome: the number of cases, the percentage of closed cases, the average cost and the average delay to referral. The report can provide useful marketing information on your performance as an business. |
Other
|
Unique Employee Logins |
This report returns a daily count of unique logins to your system for a specified date range. |
Date ranges
The following time options are available for many reports:

When Custom Range is selected dates can be entered using a date picker.
With the other options, the dates for the start and end of the selected option are displayed but they cannot be changed.
Report outputs
Report data can be output to a number of formats. You can choose:
- Preview
- Some custom reports offer the option of directly export the report output to a CSV or text file.
Click Preview to open a new browser window where the report data is displayed. This uses a template to display the report data on your screen. A choice of style sheets, such as Arial Blue, are available (at 3).
The screen offers options to save or export the report in various formats including an Excel file and a comma separated list. In Excel the data can be sorted, formatted and visualised, see Exported data in Excel.
Click Get PDF at the bottom of the screen to convert the report seen in the Preview option above to a PDF file which is immediately downloaded. You can print this from your local computer.